Welcome, honey aficionados and ambitious apiarists! Are you ready to turn your backyard buzzing factory into a veritable honey fountain?
Whether you’re drowning in honey or your jars are looking a little empty, there’s always room for improvement in the sweet science of honey production.
Did you know that a single, well-managed hive can produce up to 200 pounds of honey in a good year? That’s enough to sweeten your tea for a lifetime (or at least until next season)!
In this guide, we’ll explore the secrets to maximizing your honey yield, turning your bees from casual workers into productivity powerhouses. So, grab your hive tool, put on your thinking cap, and let’s dive into the sticky world of increased honey production!
- Queen Bee Excellence: The Royal Road to More Honey
- Hive Real Estate: Maximizing Space for Maximum Yield
- Location, Location, Location: Positioning for Productivity
- Feeding Frenzy: Boosting Bee Nutrition for Better Yields
- Pest and Disease Management: Healthy Bees, Happy Harvest
- Swarm Control: Keeping Your Workforce at Home
- Nectar Flow Mastery: Timing is Everything
- Water Sources: The Overlooked Honey Production Booster
- Hive Technology: High-Tech Solutions for Higher Yields
- Harvesting Techniques: Maximizing Extraction Efficiency
- The Final Buzz
Queen Bee Excellence: The Royal Road to More Honey
Queen bee excellence is like upgrading your car’s engine – it supercharges your whole beekeeping operation. Trust me, I’ve learned this the hard way over the years.
Selecting High-Performance Queen Strains
Selecting high-performance queens is crucial. I once thought a queen was a queen – big mistake! It’s like thinking all cars are the same until you drive a Ferrari. I splurged on a premium queen once and that hive took off like a rocket!
But watch out – I once chose a queen solely for honey production and ended up with bees meaner than a junkyard dog. Balance is key, folks.
Proper Queen Replacement Timing
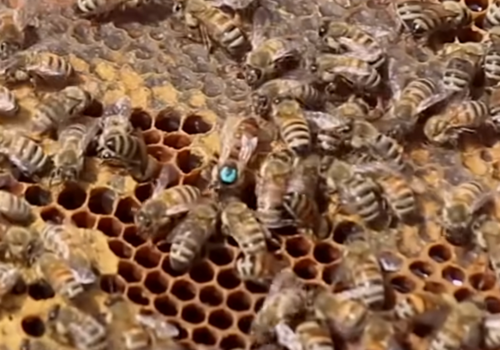
Timing queen replacement is tricky. It’s like changing your car’s oil – do it too late and you’re asking for trouble. I usually replace queens every year or two to keep hives at peak performance. But don’t wait too long in the season. I tried requeening in late fall once and spent all winter worrying about that hive.
Ensuring Queen Health and Vigor
Keeping your queen healthy is vital. Regular inspections are a must – every couple weeks during active season. I learned this the hard way when I lost a great queen ’cause I wasn’t paying attention. Check her laying pattern, watch for disease, and make sure she’s got room to work.
Don’t forget about feeding during lean times. It’s like giving your queen a protein shake. But be careful – overfeed and you might trigger swarming. I got lazy with feeding one dry summer and my honey production took a nosedive.
Bottom line: treat your queen like royalty and she’ll reward you with liquid gold. It might feel like helicopter parenting a bug sometimes, but when those frames are dripping with honey, you’ll know it’s worth it. After all, isn’t that sweet reward why we’re in this sticky business?
Hive Real Estate: Maximizing Space for Maximum Yield
When I first started beekeeping, I thought more space always meant more honey. Wow, was I wrong! I stacked supers like Jenga, thinking, “More room, more honey, right?” Nope. My bees were so spread out, they barely filled one super. Talk about a facepalm moment!
Optimal Hive Configuration for Honey Production
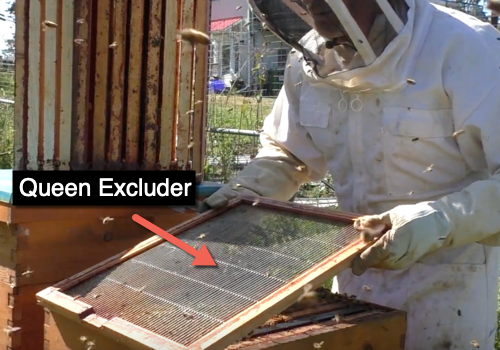
Optimal hive configuration is more art than science. It’s about finding that sweet spot where bees have enough room to work but aren’t overwhelmed. I start with a single brood box and add supers gradually. Here’s a trick: I use a queen excluder between the brood box and honey supers. Keeps her majesty downstairs where she belongs.
When and How to Add Supers
When to add supers? I follow the 70% rule. When bees fill about 70% of the current super’s frames, I add another. It’s like giving them a promotion – “Good job, team! Here’s your new corner office.”
But timing is everything. Add supers too early, and bees can’t regulate temperature properly. Too late, and you risk swarming. I learned that when half my hive decided to vacation in my neighbor’s oak tree. What a day that was!
Managing Hive Population Density
Managing hive population density is another tricky beast. It’s like being a bouncer at the world’s smallest, buzziest nightclub. You want it packed, but not uncomfortable.
I keep a close eye on the brood pattern. If it’s patchy, the queen might need replacing. One summer, I noticed an underperforming hive. After some investigation (and stings – ouch!), I realized the queen was failing. Replacing her was like hitting the reset button.
To prevent swarming, I practice “checkerboarding” – alternating empty and full frames in the supers. Gives bees more room to work.
There’ve been hiccups, like adding a super during a rainstorm. Picture me slipping in mud, balancing angry bees. Not my finest moment!
Despite occasional mishaps, getting hive configuration right has boosted my honey yields significantly. It’s all about giving bees the right space at the right time. Remember, we’re working with them, not against them. They’re the real experts here!
Location, Location, Location: Positioning for Productivity
When I first started beekeeping, I thought I could plop those hives anywhere and watch the honey flow. Wow, was I wrong! My first apiary was smack in the middle of my backyard. Seemed logical, right? Well, my bees spent more time crashing neighbors’ barbecues than collecting nectar!
Choosing Prime Apiary Spots
Choosing prime spots is crucial. It’s like real estate for bees – location, location, location! The ideal spot is somewhat elevated, with morning sun and afternoon shade. My bees are early risers, just like me.
I learned the hard way about windbreaks. Lost a whole colony one winter because the hive was too exposed. Now, I make sure there’s natural protection – trees, shrubs, or even a fence.
Maximizing Exposure to Nectar Sources
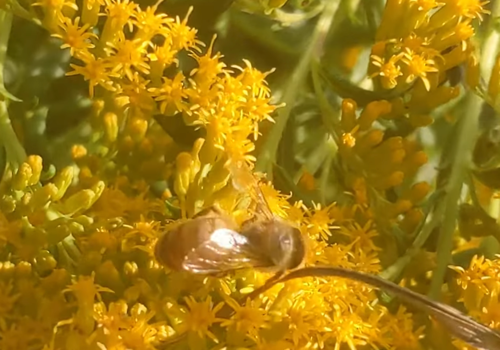
Maximizing exposure to nectar sources was another eye-opener. My little garden wasn’t enough. Bees can forage up to 3 miles! So, I started mapping out wildflowers, orchards, and even made friends with a farmer who lets me place hives near his clover fields. Win-win!
Protecting Hives from Extreme Weather
Protecting hives from extreme weather? That’s where I’ve had some real “learning experiences”. Like the time I thought I was clever placing a hive under a big oak for shade. Worked great until a storm brought down a branch. Goodbye, hive. Hello, angry bees!
Now, I create micro-climates for my hives. Shade structures for hot areas, insulation wraps for cold climates. But don’t go overboard – bees need ventilation. I learned this when I wrapped a hive too tightly one winter. Come spring, it was a humid mess inside.
Hive stands are a game-changer. Keeps hives off the ground, helps with ventilation, and saves my back during inspections. Started with concrete blocks, now I’ve got fancy adjustable metal stands. My bees are living in high-rises!
Remember, finding the perfect spot is a mix of science, observation, and luck. Keep watching your bees, talk to local beekeepers, and be ready to make changes. Happy bees make more honey, and the right home is key to that happiness. Just be prepared for a few stings and laughs along the way!
Feeding Frenzy: Boosting Bee Nutrition for Better Yields
When I started beekeeping, I thought bees were totally self-sufficient. My first spring, I noticed my bees seemed lethargic and honey production was pitiful. Turns out, there was a nectar dearth I didn’t know about. My poor bees were running on empty!
Strategic Feeding Schedules
That’s when I learned about strategic feeding schedules. It’s not just about throwing sugar water at them whenever. Timing is everything. I start feeding lightly in late winter to stimulate brood rearing. It’s like giving them an energy boost to kick off the season.
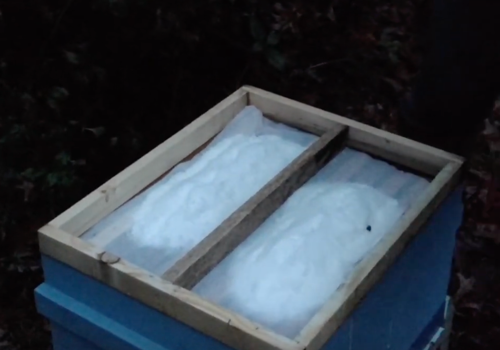
But don’t overdo it! I once fed so much that the bees filled brood cells with syrup instead of raising new bees. Talk about a facepalm moment!
Best Feed Types for Honey Production
I’ve tried all sorts of feeds. Started with sugar water, then discovered pollen patties. My bees went nuts for those! But not all pollen substitutes are equal. Some have better protein content.
Balancing Natural Foraging with Supplemental Feeding
Balancing natural foraging with supplemental feeding is an art. You want to support your bees without making them lazy. It’s like raising teenagers – give them too much, and they’ll never leave the hive!
I keep a “bloom calendar” now, noting when different flowers produce nectar. This helps me anticipate when my bees might need extra help. If there’s a gap between nectar flows, I’ll start supplemental feeding to bridge it.
But be careful with timing. Feed too much during a honey flow, and you risk diluting your honey with sugar syrup. I learned this when my “wildflower” honey tasted suspiciously like plain sugar. Oops!
Here’s a tip: use colored syrups for feeding. If you see colored syrup in honey supers, you know you’re overfeeding.
Despite the trial and error, there’s something satisfying about seeing your bees thrive with a little help. It’s like partnering with them, giving them a boost when needed.
Just remember, every hive is different. Observe your bees, understand their needs, and be willing to adjust. And hey, if you make a mistake, don’t sweat it. The bees are pretty forgiving – as long as you keep the snacks coming!
Pest and Disease Management: Healthy Bees, Happy Harvest
When I started beekeeping, I thought my biggest worry would be getting stung. Ha! The real threats are often too small to see. Let me tell you, pest and disease management has been quite the adventure!
Proactive Varroa Mite Control
First up, Varroa mites – the tiny vampires of the bee world. I do regular mite counts using sticky boards and sugar rolls. It’s like CSI: Beehive Edition! I’ve tried everything from essential oils to oxalic acid vaporization. Even experimented with drone frame trapping – it’s like playing bait-and-switch with mites.
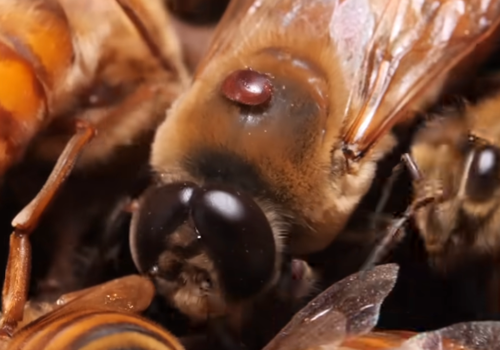
But here’s the kicker – what works one season might not work the next. These buggers are adaptable. So I’m always ready to switch up my tactics.
Recognizing and Treating Common Bee Diseases
Recognizing bee diseases is crucial. I’ll never forget my first case of Chalkbrood. Thought my bees had developed a taste for marshmallows! Nope, just mummified larvae. Early detection and swift action are key. I keep detailed records of each hive’s health. It’s like being a bee doctor!
For treatment, I start with the least invasive methods. Sometimes, just improving ventilation or replacing old comb does the trick. But I’m not afraid to use medication when necessary.
Natural Methods to Boost Hive Immunity
Now, boosting hive immunity naturally – that’s where it gets fun! I use herbal infusions in sugar syrup. Thyme and lemongrass are favorites. Once got overzealous with lemongrass oil – my apiary smelled like a Thai restaurant for weeks!
I’ve also become a bee nutritionist, experimenting with pollen substitutes. Even turned half my yard into a pollen paradise. My neighbors probably think I’m nuts!
Maintaining genetic diversity is crucial too. I raise queens from strong hives and bring in new genetics. It’s like running a matchmaking service for bees!
Despite the challenges, there’s nothing like seeing a healthy, thriving hive. Every problem solved is a lesson learned. And trust me, the sweet taste of honey from a hive you’ve nursed through thick and thin? Totally worth it!
Swarm Control: Keeping Your Workforce at Home
Keeping your bees from swarming is like trying to keep kids from raiding the cookie jar – it takes vigilance and a bit of trickery. I’ve been at this beekeeping gig for over a decade, and I’ve learned a thing or two about keeping those buzzers at home.
First off, you gotta spot the signs. If you see queen cells popping up like mushrooms after rain, or your workers start slacking on the job, it’s time to act. I once ignored these signs and lost half my hive. Talk about a facepalm moment!
Recognizing and Preventing Swarming Behavior
To prevent swarming, give your bees some breathing room. Add supers or frames before the hive gets too crowded. Trust me, waiting till they’re busting at the seams is like trying to stop a runaway train – it ain’t gonna happen.
Splitting Hives to Manage Population
Splitting hives is another trick up my sleeve. It’s like creating a spin-off of your favorite TV show – you’re giving part of the cast their own storyline. The first time I tried it, I was sweating bullets. But it works wonders for managing population and preventing swarms.
Using Swarm Traps to Recapture Lost Bees
And if all else fails? Swarm traps are your best friend. Think of ’em as bee bait. I once caught a beauty of a swarm in an old box from my granddad’s shed. Location is key – about 10-15 feet high in a shady spot does the trick. Pro tip: a dab of lemongrass oil makes it irresistible.
Remember, beekeeping’s all about being proactive. Some days you’ll feel like you’re herding cats, but when you succeed in keeping your little workforce happy, there’s nothing sweeter. Well, except the honey, of course!
Nectar Flow Mastery: Timing is Everything
Mastering nectar flows is like trying to predict when your kids’ll actually eat their veggies – tricky, but oh so rewarding when it happens. I’ve been at this bee game for years, and let me tell you, timing is everything.
Understanding Local Nectar Flows
Understanding your local nectar flows is crucial. It’s like cracking a secret code. I spent ages bugging old-timers at the farmers market and keeping a nerdy little nectar journal. Sounds lame, but it’s a game-changer. After a few years, you’ll feel like a bee psychic!
But knowing when the flow’s coming is only half the battle. You gotta prep those hives like you’re training ’em for the bee Olympics. I learned this the hard way when I once neglected a hive before a major flow. Talk about a missed opportunity!
Preparing Hives for Peak Production Periods
Now, I start prepping weeks in advance. Make sure the queen’s laying well, the hive’s pest-free, and there’s plenty of space for all that sweet, sweet nectar. I even do a little “spring cleaning” to give my girls a head start.
Techniques for Extending the Honey Season
Wanna extend the honey season? Get creative! I turned my backyard into a “bee buffet” with plants blooming from early spring to late fall. And don’t be afraid to try a little migratory beekeeping. Moving hives around locally can really boost production.
Of course, not every experiment’s a winner. There was that time I tried feeding sugar water late into fall… Let’s just say Mother Nature knows best.
At the end of the day, it’s all about observation, preparation, and learning from your goofs. When you get it right, seeing those supers fill up with liquid gold, there’s no better feeling. So keep your eyes on the flowers, your ears to the ground, and your hives humming. Your taste buds’ll thank you!
Water Sources: The Overlooked Honey Production Booster
When I first started beekeeping, I had no clue how important water was for honey production. Talk about a rookie mistake!
I remember my first scorching summer, noticing my bees hanging around my neighbor’s birdbath instead of my carefully planted flowers. It hit me – they needed water, and I hadn’t provided any. Some bee parent I was!
Providing Clean, Accessible Water
Providing clean, accessible water isn’t as simple as putting out a bowl. Bees can drown easily in deep water. I learned that the hard way when I found some floating in a rain bucket. Not my proudest moment.
After some trial and error, I found shallow containers with pebbles or cork work great. The bees can land and drink safely. I even add a pinch of sea salt for minerals. Who knew bees needed that?
Creating Bee-Friendly Water Features
I got creative and set up a small, recirculating fountain with different levels. It’s like a bee water park! It’s become a hub of activity, attracting butterflies and birds too.
Now, here’s the kicker – the link between hydration and honey production. Bees need about a gallon of water for every pound of honey. By providing water closer to the hive, my bees seemed less stressed and more productive.
The Link Between Hydration and Honey Production
After improving the water situation, my honey production went up by almost 20%! The quality improved too – smoother with a more complex flavor.
Of course, there’ve been some funny moments. Like when I tried adding floating plastic flowers to the water feature. The bees gave me the cold shoulder until I removed them!
So, don’t overlook water sources in beekeeping. Your bees will thank you, and your honey harvests will likely improve. Happy, well-hydrated bees make for sweet, abundant honey. And isn’t that what it’s all about?
Hive Technology: High-Tech Solutions for Higher Yields
Alright, let me tell you about my wild ride with hive technology. Some beekepers say it’s a game-changer for their beekeeping adventures!
Using Hive Monitoring Systems
I’m use a mix of old-school approaches – manually checking hives and playing guessing games. But man, did that lead to some headaches. I remember this one stubborn colony that had me suited up every other day, probably annoying the bees more than helping.
That’s when I decided to give hive monitoring systems a shot. At first, I was like, “How much can a few sensors really do?” Turns out, a ton! These gadgets track everything from hive weight to bee activity. It’s like having a 24/7 beekeeper without the stings.
The weight monitoring feature is super cool. I can see exactly when a honey super is ready for harvesting. No more unnecessary inspections!
Temperature and Humidity Control for Optimal Production
Now, let’s talk temperature and humidity control. I thought bees were pros at regulating their environment, but with a little high-tech help, we can create perfect conditions. Last summer, during a nasty heatwave, my system alerted me to dangerously high temperatures. I quickly set up some shade and saved my bees from heat stress.
Data-Driven Decision Making in Honey Management
The best part? Data-driven decision making. I’ve spotted patterns I never noticed before. For example, I realized my honey production always dips two weeks after major rainfall. Now I supplement my bees’ diet during these periods, and my yields are more consistent than ever.
It hasn’t all been smooth sailing, though. There was definitely a learning curve. I once installed sensors upside down and spent hours wondering why they weren’t working. Oops!
Despite the occasional hiccup, technology can make life easier and significantly improved my hives’ health and productivity. If you’re on the fence about hive technology, I say why not give it a try. I don’t use it in all the time, I still like the old school approach most of the time.
Harvesting Techniques: Maximizing Extraction Efficiency
When I first started beekeeping, I thought harvesting honey would be a breeze. But my first harvest was a sticky disaster. I pulled frames willy-nilly, not checking if they were fully capped. Ended up with runny, unripe honey that fermented faster than you can say “mead”.
Timing Your Honey Harvest for Peak Yield
Timing is crucial, folks. These days, I wait until at least 80% of cells are capped before harvesting. It’s tempting to jump the gun, but patience pays off. I’ve even started timing harvests with local blooms. Once, I waited an extra week for goldenrod to bloom. Result? Knockout dark amber honey!
Efficient Uncapping and Extraction Methods
Uncapping was another adventure. My first attempt looked like a crime scene – wax everywhere! Investing in a proper uncapping knife was a game-changer. Pro tip: keep a pot of hot water nearby to dip the knife. Glides through wax like a dream.
For extraction, I started with a hand-crank. Talk about a workout! Eventually, I splurged on an electric extractor. My arms thanked me. But here’s a lesson – don’t overload it! I once crammed in too many frames, ending up with a mess and unevenly extracted honey.
Minimizing Waste During the Harvesting Process
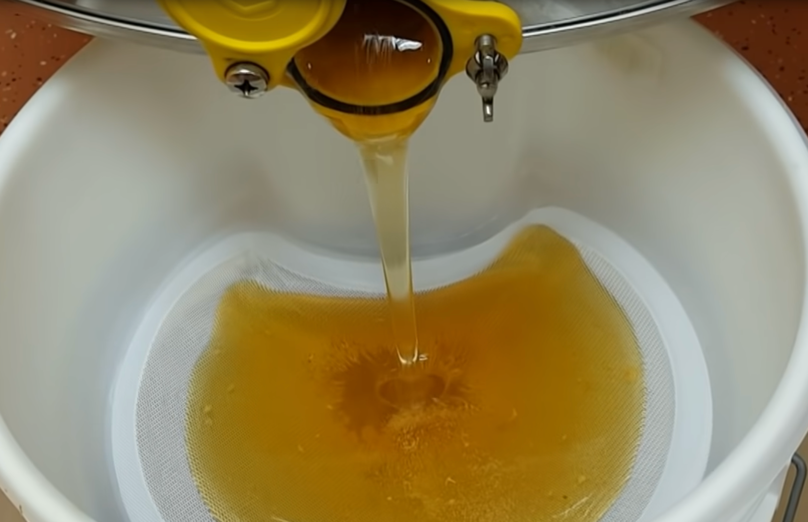
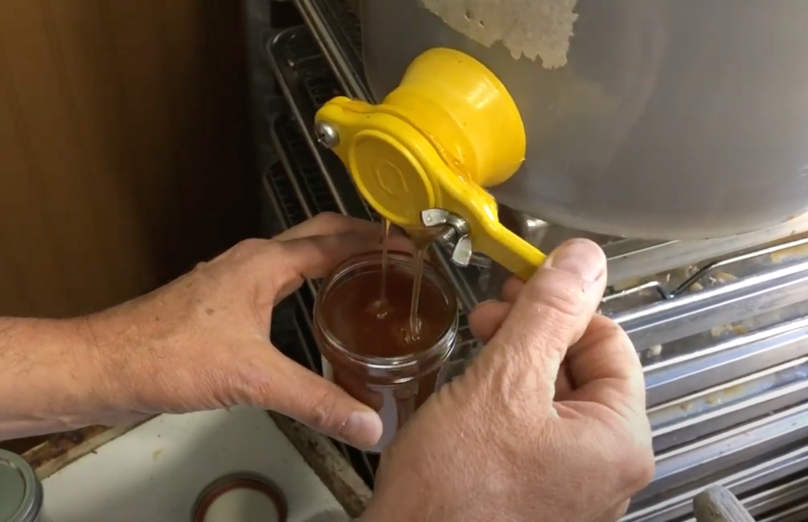
Minimizing waste became my obsession. I use a honey gate on my extractor to control flow and reduce spills. I also save wax cappings – they’re full of honey! Strain them through fine mesh for extra yield. And always have a clean bucket under your uncapping station. Every drop counts!
I’ve had my share of mishaps. Once, I got overconfident and flung wax everywhere. My poor dog wandered in and got covered! Took hours to clean him up.
Despite occasional sticky situations, there’s nothing like a successful harvest. The sweet smell, the golden flow – it’s magical. So if you’re starting out, don’t get discouraged. Keep learning, keep experimenting, and enjoy the sweet rewards of beekeeping!
The Final Buzz
Congratulations, honey production maestros! You’re now armed with the knowledge to turn your hives into veritable honey fountains. Remember, increasing honey production is a delicate balance of science, timing, and a little bit of bee whispering.
With these tips, you’ll be swimming in liquid gold faster than you can say “pass the honey dipper.” Just don’t forget to leave enough for your hardworking bees – after all, a well-fed workforce is a productive one! Now go forth, implement these strategies, and may your honey jars always be overflowing

