Welcome, honey hunters and liquid gold seekers! Ready to dive into the sticky world of honey harvesting? Whether you’re a backyard beekeeper or a curious honey enthusiast, understanding the art of honey harvesting is sweeter than, well, honey itself!
Did you know that humans have been harvesting honey for over 8,000 years? That’s older than the pyramids! Today, we’re exploring modern techniques that make our ancient honey-loving ancestors proud. So, grab your bee smoker, and let’s get this honey party started!
- 1. Timing Is Everything: When To Harvest
- 2. The Smoke Show: Preparing Your Hive
- 3. Frame Game: Removing Honey Frames
- 4. Uncapping Magic: Revealing Liquid Gold
- 5. Extraction Station: Spinning Out The Sweet Stuff
- 6. Straining And Filtering: Clarity Is Key
- 7. Bottling Brilliance: Packaging Your Harvest
- 8. Comb Honey Harvesting: Au Naturel Sweetness
- 9. Sustainable Harvesting: Keeping Bees Happy
- 10. High-Tech Honey: Modern Harvesting Innovations
- The Final Buzz
1. Timing Is Everything: When To Harvest
Alright, let me tell you about harvesting honey – it’s all about timing!
When I first started beekeeping, I was like a kid in a candy store. I wanted to harvest that sweet, golden goodness as soon as possible. Big mistake. I ended up with a bunch of unripe honey that fermented faster than my grandpa’s homemade hooch. Not exactly what I was going for.
Signs Your Honey Is Ready
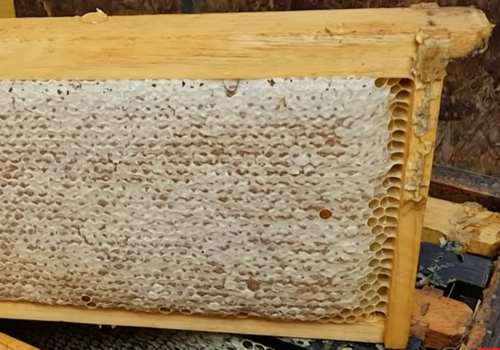
So, how do you know when honey’s ready? Well, it’s like a good steak – you gotta check for doneness. The bees are pretty smart cookies. They’ll cap the honeycomb cells with wax when the honey’s just right. That’s your green light. If most of the frame is capped, you’re good to go. I like to do the shake test too – if you give the frame a good shake and nothing comes out, it’s harvest time, baby!
Seasonal Considerations
Now, let’s talk seasons. Depending on where you live, you might get one big harvest or several smaller ones. I usually harvest in late summer or early fall. But I’ve got a friend in Florida who harvests multiple times a year. Lucky duck.
Leaving Enough For The Bees
Here’s the kicker though – you gotta leave enough for the bees. These little guys work their stingers off all season, and they need food to get through the winter. First year I harvested, I got greedy and took too much. Ended up having to feed my bees sugar water all winter. Talk about a rookie move.
I’ve learned to leave at least 60-80 pounds of honey per hive for winter. Better to err on the side of caution, ya know? Plus, leaving some honey means the bees start strong in spring, which usually means more honey for me later. Win-win!
So remember, when it comes to harvesting honey, patience is key. Wait for those capped cells, consider your local seasons, and always, always leave enough for the bees. Trust me, your honey (and your bees) will be all the better for it!
2. The Smoke Show: Preparing Your Hive
Let me tell ya about preparing your hive for harvest – it’s all about the smoke show, baby!
Proper Use Of Bee Smokers
First time I opened my hive without a smoker, I looked like I’d gone ten rounds with a heavyweight boxer. Those bees were not happy to see me, lemme tell ya. But then I learned about the magic of smoke, and it was like night and day.

Calming Techniques For Bees
So, here’s the deal with bee smokers. You wanna use ’em, but not go all Smokey the Bear on your hive. A little puff here and there is all you need. I learned the hard way that too much smoke can make the bees gorge on honey and get all sluggish. Not ideal when you’re trying to harvest.
I use a mix of pine needles and dry leaves in my smoker. Gives a nice, cool smoke that doesn’t irritate the bees (or me). Pro tip: light your smoker before you suit up. Nothing worse than trying to light that thing with gloves on. Trust me, I’ve been there.
Safety First: Protective Gear Essentials
Speaking of suiting up, don’t skimp on protective gear. I once thought I could just pop on a veil and be fine. Rookie mistake. Got stung right on my… well, let’s just say sitting was uncomfortable for a while. Now I always wear a full suit, gloves, and boots. Better safe than sorry, right?
When you’re at the hive, move slow and steady. Bees don’t like quick movements – makes ’em think you’re a predator. I talk to ’em too, nice and calm-like. Probably looks crazy to the neighbors, but hey, it works!
Remember, the goal is to keep the bees calm, not to hotbox ’em. Use that smoker sparingly, move slow, and always gear up properly. Do that, and harvesting’ll be smooth as honey. Well, most of the time anyway. There’s always that one hive that likes to keep ya on your toes!
3. Frame Game: Removing Honey Frames
Alright, let’s talk about the frame game – aka how to get that liquid gold outta the hive without ticking off your tiny tenants!
Spotting Fully Capped Frames
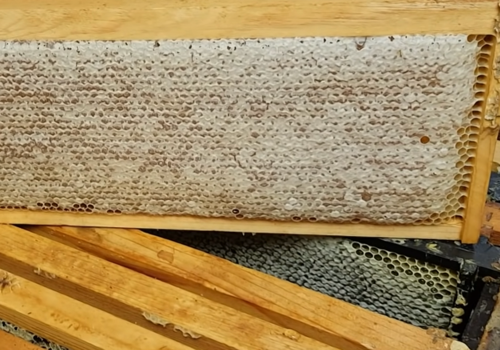
First things first, you gotta know what you’re looking for. A fully capped frame is like the holy grail of beekeeping. It’s when those industrious little ladies have sealed up all the honey cells with a thin layer of wax. Looks kinda like a white honeycomb blanket. First time I saw one, I nearly did a happy dance right there in the apiary!
Gentle Removal Techniques
Now, removing these frames? It’s like a delicate dance. You can’t just yank ’em out like you’re pulling weeds. Nuh-uh. You gotta be gentle, like you’re handling your grandma’s china. I use a hive tool to carefully pry the frame loose. Slow and steady wins the race.
Dealing With Clingy Bees
But here’s where it gets tricky – the bees. Wow, do they love to cling to those frames! It’s like they know you’re about to make off with their hard work. I remember the first time I tried to brush them off, I ended up with a face full of angry bees. Not my finest moment.
These days, I use a soft brush to gently sweep the bees off the frame. Some beekeepers use a bee blower, but I find that a bit too aggressive. Plus, it makes me feel like I’m in some weird bee-themed action movie.
If you’ve got a really stubborn bunch, try giving the frame a sharp shake over the hive. Most of the bees’ll fall right off. Just be careful not to drop the frame – learned that one the hard way. Nothing like watching a full frame of honey splat on the ground to ruin your day.
4. Uncapping Magic: Revealing Liquid Gold
Alright, let’s dive into the sweet world of uncapping honey – it’s like unwrapping a golden present, I tell ya!
So, you’ve got your frames full of capped honey, and now it’s time for the big reveal. This is where the magic happens!
Types Of Uncapping Tools
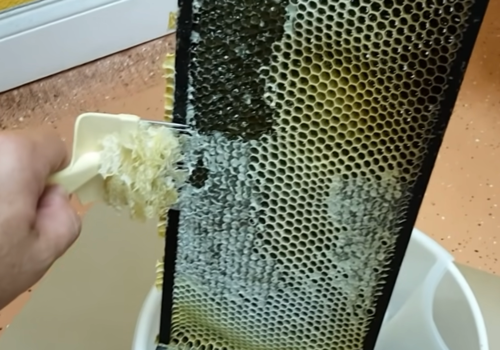
First off, let’s talk tools. You’ve got a few options here. There’s the classic uncapping knife, which comes in hot and cold varieties. Then you’ve got your fancy-pants electric uncapping knives, and for the real pros, there’s even motorized uncapping machines. I started with a cold knife, thinking I was all that and a bag of chips. Wow, was I in for a surprise!
My first attempt at uncapping was… well, let’s just say it wasn’t pretty. I mangled those caps like a bear in a beehive. Honey everywhere, wax flying – it was a sticky situation, literally! That’s when I learned about hot knives. Game changer, I’m telling ya!
Hot Knife Vs. Cold Knife Methods
Hot knives slice through those wax caps like a hot knife through… well, wax. See what I did there? Anyway, you just heat ’em up and glide ’em across the frame. It’s oddly satisfying, like mowing a tiny, waxy lawn.
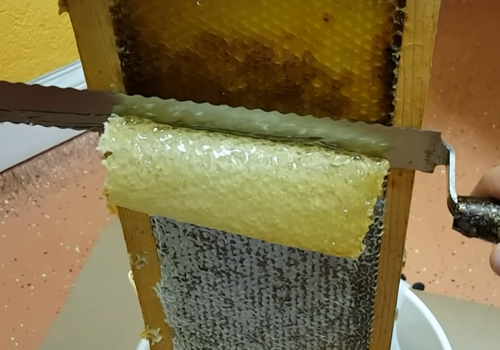
Now, cold knives have their place too. They’re great for precision work and don’t heat up the honey. But let me tell ya, they require a bit more elbow grease. I still use mine sometimes when I’m feeling nostalgic… or when I forget to plug in the hot knife.
Uncapping Tanks And Trays
Whatever tool you choose, you’re gonna need something to catch all that wax and honey. That’s where uncapping tanks and trays come in. First time I uncapped without one, my kitchen looked like a honey bomb went off. My husband wasn’t too thrilled about that!
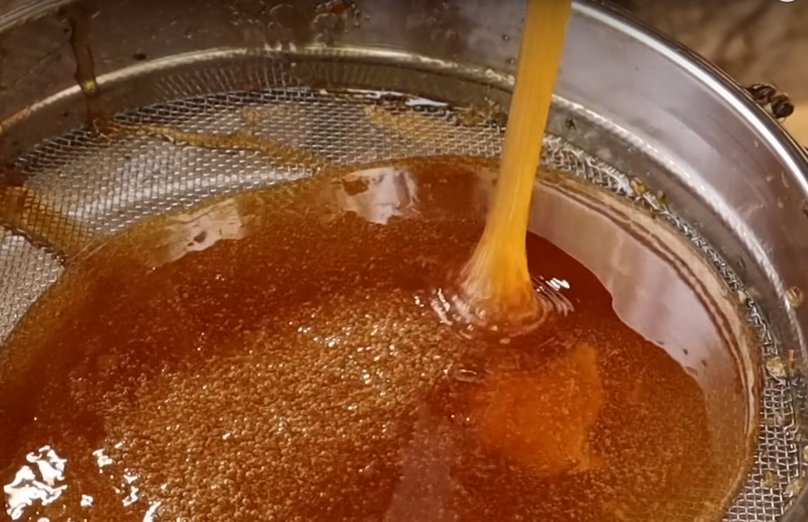
These days, I use a nice big uncapping tank. The frames sit on top, I do my slicing and dicing, and all the goodies fall right in. The honey drains to the bottom, and I’m left with a pile of wax cappings that smell like heaven.
Just remember, uncapping is an art form. Too deep, and you’re wasting honey. Too shallow, and you’re making extra work for yourself. It takes practice, but before you know it, you’ll be uncapping like a pro. And trust me, that first taste of freshly uncapped honey? Worth every sticky finger!
5. Extraction Station: Spinning Out The Sweet Stuff
Alright, let’s dive into the sweet world of honey extraction! I’ve been keeping bees for almost 15 years, and wow, have I learned a thing or two about getting that liquid gold out of those frames.
Manual Vs. Electric Extractors
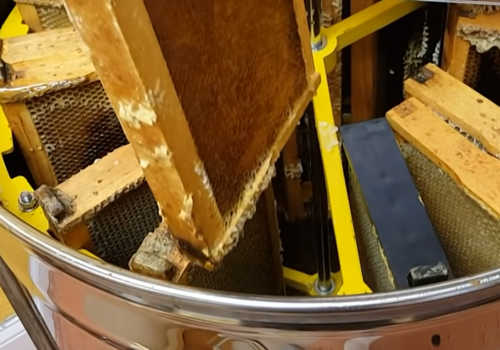
When I first started, I was all about that manual extractor life. You know, the kind where you’re cranking that handle like you’re trying to start an old Model T Ford? Yeah, that was me. Sweating buckets, arms feeling like jelly, but man, the satisfaction of seeing that first drop of honey fall was something else.
But then I got wise (or maybe just lazy) and invested in an electric extractor. Game changer! It’s like going from a bicycle to a motorcycle. Sure, it’s a bit pricier upfront, but trust me, your back will thank you later.
Radial Vs. Tangential Extraction
Now, let’s talk extraction methods. Radial vs. tangential – sounds fancy, right? Radial’s my go-to these days. You just pop those frames in like spokes on a wheel, and let ‘er rip. It’s faster and gets more honey out.
But I’ll let you in on a little secret – I still use tangential for my chunk honey production. It’s gentler on the comb, which is key when you’re trying to keep those pretty wax chunks intact.
Maximizing Honey Yield
Wanna maximize your honey yield? Here’s a pro tip: warm up your frames before extracting. I stick mine in a warm room (about 85°F) for a day before extraction. The honey flows like… well, honey! And don’t forget to uncap those cells completely. I learned that the hard way when I rushed it once and ended up with half my honey still stuck in the frames. Talk about a sticky situation!
6. Straining And Filtering: Clarity Is Key
Let me tell you, when I first started beekeeping, I thought filtering honey was gonna be a breeze. Wow, was I wrong! I remember my first attempt – ended up with more wax in my honey than a candle factory. Talk about a sticky situation!
Choosing The Right Filters
Over the years, I’ve learned that choosing the right filters is crucial. At first, I was using whatever I could find in my kitchen – coffee filters, cheesecloth, you name it.
But trust me, investing in some proper honey filters is worth every penny. I usually go for a coarse strainer first, then a finer one. It’s like giving your honey a spa treatment – first the rough scrub, then the gentle polish.
Double-Straining Techniques
Now, let’s chat about double-straining. It’s a game-changer! I used to think one pass through the filter was enough, but nope! Double-straining is where it’s at. First time through gets rid of the big chunks, second time makes it crystal clear. It takes a bit more time, sure, but the results? Chef’s kiss
Dealing With Wax And Debris
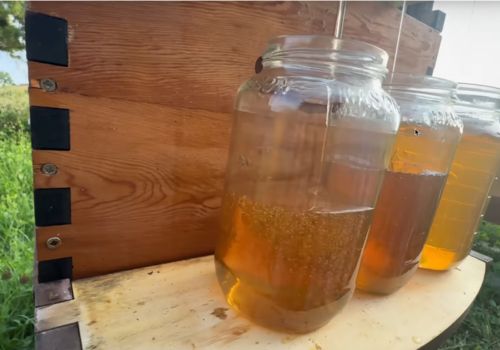
Dealing with wax and debris was my nemesis for a while. I’d end up with bits of wax floating in my jars like little honey icebergs. Not exactly appetizing, right? Here’s a trick I picked up: gravity is your friend. Let your honey settle in a large container for a day or two before the final strain. Most of the wax and debris will float to the top, making it easier to separate.
One time, I got impatient and skipped this step. Ended up with jars that looked like they had dandruff. Not my proudest moment, let me tell you!
Remember, clarity isn’t just about looks. It’s about quality. Clear honey lasts longer and tastes better. So take your time, use the right tools, and your honey will be the talk of the farmers market. Trust me, I learned the hard way so you don’t have to!
7. Bottling Brilliance: Packaging Your Harvest
Alright, let’s talk bottling! This is where the rubber meets the road in beekeeping – or should I say, where the honey meets the jar? Ha!
Proper Bottling Temperatures
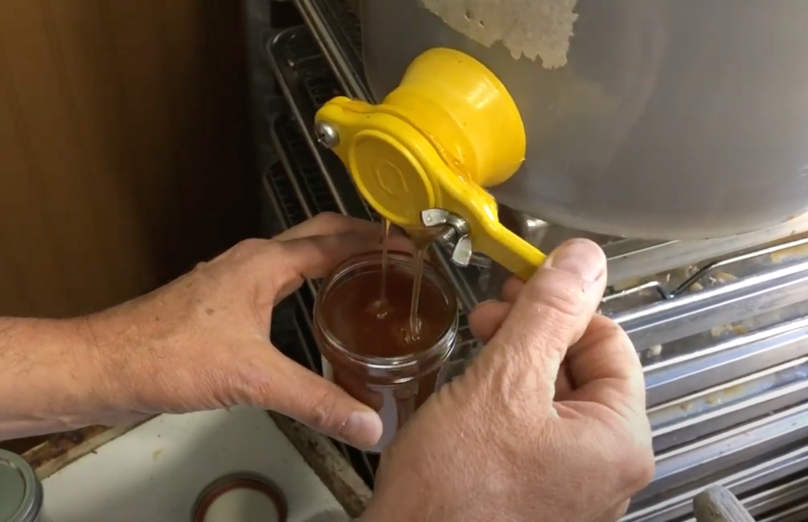
First things first: temperature. I learned this when I bottled a batch straight outta the extractor. Big mistake! The honey was full of air bubbles and looked like a science experiment gone wrong. Now, I always warm my honey to about 95°F before bottling. It’s like giving it a nice warm bath – makes it flow smoother and keeps those pesky air bubbles at bay.
Choosing The Right Containers
Choosing containers used to stress me out. Glass or plastic? Big or small? I’ve tried ’em all, and here’s my two cents: glass jars are the way to go for that premium look. But if you’re selling at farmers markets, don’t discount plastic bears. People go nuts for those little guys! I once tried some fancy hexagonal jars – looked great, but were a pain to fill. Learned my lesson there!
Labeling And Storage Tips
Now, labeling. Oh wow, this is where I really messed up when I first started. Handwritten labels with my chicken scratch? Not a good look. Invest in some decent labels and a printer, trust me. Your honey deserves to look as good on the outside as it tastes on the inside.
Storage tips? Keep it cool and dark,. I made the mistake of storing some jars on a sunny windowsill once. By the time I remembered them, they looked like honey lava lamps. Not ideal!
One last thing – don’t overfill those jars! Leave a little headspace. I learned this when I filled a jar to the brim and it started oozing out the top as soon as I screwed on the lid. What a mess!
Remember, bottling is your honey’s final outfit before it meets the world. Make it look good, but more importantly, make sure it’s practical. You want your customers opening that jar with a smile, not a struggle!
8. Comb Honey Harvesting: Au Naturel Sweetness
Let me tell you about comb honey harvesting. It’s like the difference between store-bought tomatoes and ones straight from your garden – there’s just no comparison!
Cut Comb Techniques
I remember my first attempt at cut comb. I thought, “How hard can it be? It’s just cutting squares, right?” Wrong! I ended up with a sticky mess that looked like it had been through a blender.
Now, I use a heated knife and take it slow. It’s like performing surgery on those frames, but the result is worth it. Pro tip: chill the comb slightly before cutting. Makes it easier to get those clean, precise cuts that’ll make your customers’ eyes pop.
Chunk Honey Production
Chunk honey production? Now that’s where I really got to flex my creative muscles. It’s like making a honey and wax parfait! I used to just plop a chunk of comb into a jar and call it a day. But, presentation is key. Now I carefully cut perfect rectangles of comb and gently lower them into the jars. Then I pour that liquid gold around it. It’s like creating a work of art, I tell ya.
Preserving Comb Honey
Preserving comb honey gave me nightmares at first. I once left a batch out too long and it started to weep – and then I was the one weeping! Learned my lesson there. Now, I store it in a cool, dry place. And here’s a little secret: if you’re not selling it right away, pop it in the freezer. It’ll keep for months that way.
One time, I tried to get fancy and added some local lavender to my comb honey. Let’s just say it didn’t go over well at the farmer’s market. Stick to the pure stuff, folks. Mother Nature knows best when it comes to comb honey.
Remember, comb honey is the caviar of the honey world. Treat it with respect, and your customers will be coming back for more. Just be prepared for sticky fingers – it’s part of the comb honey experience!
9. Sustainable Harvesting: Keeping Bees Happy
Let’s talk about sustainable harvesting. This is something I wish I’d known more about when I first started beekeeping. Wow, did I make some mistakes!
Leaving Honey For Winter Stores
I remember my first year, I got so excited about the honey that I took way too much. Come winter, my poor bees were struggling. It was like I’d robbed their pantry right before a long, cold winter. Not cool, right? Now, I always make sure to leave at least 60-70 pounds of honey per hive for winter stores. It’s like putting money in the bank for the bees.
Avoiding Over-Harvesting
Avoiding over-harvesting is crucial, but man, it can be tempting when you see those full frames! I once got greedy and took almost everything, thinking I’d just feed the bees sugar water to make up for it. Big mistake! The bees weren’t happy, and honestly, neither was I. The honey from the next season just didn’t taste the same. Lesson learned: moderation is key, even in beekeeping.
Feeding Bees Post-Harvest
Now, about feeding bees post-harvest. This is something I do when necessary, but I try to avoid it if I can. It’s like giving kids candy instead of a balanced meal – it’ll keep them going, but it’s not ideal. If I do need to feed, I use a 2:1 sugar syrup. And let me tell you, the first time I made this, I ended up with a kitchen that looked like a sugar bomb had gone off!
One year, I experimented with leaving more honey than usual. The next spring, those hives were booming! It was like they had hit the jackpot over winter. The honey production that year was off the charts.
Remember, we’re not just honey farmers, we’re bee caretakers. Happy bees make the best honey, and sustainable practices keep them buzzing along nicely. It might mean a little less honey for us in the short term, but in the long run, everybody wins – especially those hardworking little bees!
10. High-Tech Honey: Modern Harvesting Innovations
Alright, let’s buzz through these high-tech honey innovations! When I first heard about ’em, I was skeptical. Me, an old-school beekeeper, using gadgets? No way! But wow, was I in for a surprise.
Flow Hive Technology
Take the Flow Hive. Honey on tap? Sounds like a dream, right? Well, it kinda is! But let me tell you, it’s not all smooth sailing. I once got cocky and didn’t check the hive properly before harvesting. Ended up with a batch of unripe honey. Oops!
Automated Extraction Systems
Then there’s the automated extraction systems. These babies are game-changers! No more arm-aching cranking. But word to the wise: secure that lid tight. My first time? Looked like a honey tornado hit my extraction room!
Infrared Honey Moisture Analyzers
Now, infrared honey moisture analyzers. Fancy name, right? These things are pretty nifty, but they’re not foolproof. I once showed up to a beekeepers’ meeting, all ready to show off my high-tech toy. Dead battery. Had to borrow old Joe’s refractometer. Talk about embarrassing!
But here’s the thing: all this tech is great, but it can’t replace good old beekeeping know-how. It’s like giving a kid a smartphone before they can read – cool, but not super useful.
At the end of the day, beekeeping’s still about understanding those amazing little insects. The tech just helps us work smarter, not harder. And if it means more time watching my bees and less time sweating over extraction, count me in!
Just remember, there’s gonna be a learning curve. But trust me, once you get the hang of it, you’ll wonder how you ever managed without it. Happy high-tech beekeeping, folks!
The Final Buzz
There you have it, honey heroes! From traditional techniques to high-tech innovations, honey harvesting is a sweet blend of art and science. Remember, the key to successful harvesting is respecting your bees and their hard work.
With these techniques in your beekeeping toolkit, you’re all set to enjoy the fruits (or should we say, the honey) of your labor. So, gear up, get out there, and may your harvests always be bountiful and buzz-worthy!
Pro Tip: Always taste-test your honey right after harvesting. It’s not just quality control; it’s a well-deserved reward for your hard work. After all, being a beekeeper has its sweet perks!

