Ready to join the sustainable living revolution? I’ve spent years perfecting these beeswax recipes, and here’s something amazing – making your own beeswax products can reduce your household plastic waste by up to 50%!
From luxurious lip balms to eco-friendly food wraps, these DIY recipes will transform your home into a natural, chemical-free haven. Plus, you’ll save money while creating gifts that friends and family will absolutely love! Get ready to embrace the magic of beeswax crafting!
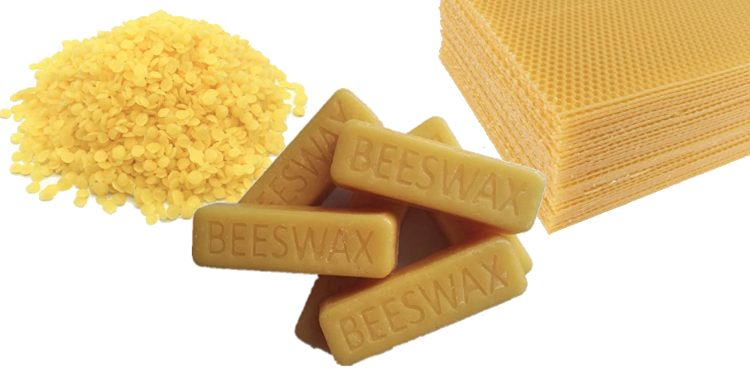
Before diving into your beeswax crafting journey, ensure you’re starting with quality materials. For help finding the right supplies, check out my sourcing beeswax buyer’s companion. Now, let’s explore the wonderful world of beeswax crafting!
- 1. Introduction & Benefits of Beeswax
- 2. Essential Tools and Equipment
- 3. Basic Beeswax Recipes
- 4. Advanced Recipes
- 5. Additional Beeswax Projects
- 6. Recipe Ratios and Measurements
- 7. Troubleshooting Guide
- 8. Temperature Guidelines
- 9. Storage and Shelf Life
- 10. Professional Tips and Best Practices
- Resources and Further Reading
- Final Notes
1. Introduction & Benefits of Beeswax
Beeswax is nature’s miracle material, offering numerous benefits:
- Natural preservative properties
- Water-resistant capabilities
- Anti-inflammatory effects
- Antibacterial qualities
- Non-toxic and food-safe
- Sustainable and biodegradable
2. Essential Tools and Equipment
Basic Tools:
- Double boiler or dedicated wax melter
- Thermometer (candy thermometer works well)
- Silicone molds or containers
- Measuring cups and spoons
- Heat-safe mixing bowls
- Wooden stirring utensils
- Clean cloths for cleanup
Safety Equipment:
- Heat-resistant gloves
- Protective eyewear
- Workspace protection
- Fire extinguisher
- Proper ventilation
Common Ingredients:
- Pure beeswax
- Carrier oils (coconut, almond, olive)
- Essential oils
- Natural colorants
- Vitamin E oil
3. Basic Beeswax Recipes
DIY Beeswax Candles
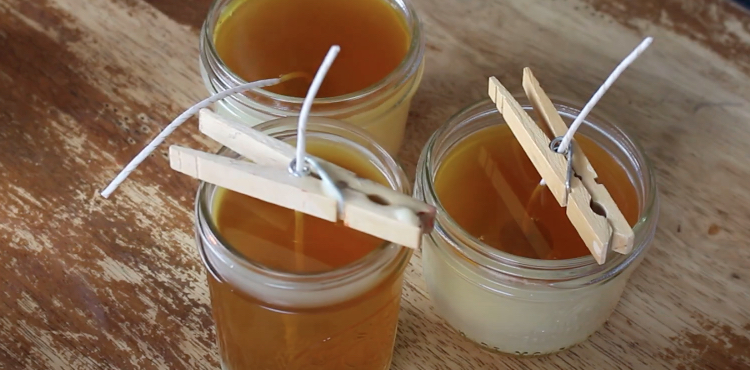
Container Candles
Ingredients:
- 1 pound pure beeswax
- Cotton or hemp wicks
- Heat-safe containers
Instructions:
- Center wicks in containers
- Melt beeswax to 165°F (74°C)
- Pour carefully into containers
- Allow to cool completely (4-6 hours)
- Trim wicks to 1/4 inch
Rolled Candles
Materials:
- Beeswax sheets
- Cotton wick
- Ruler
- Scissors
Process:
- Cut wick slightly longer than sheet
- Place wick along edge
- Roll tightly, applying gentle pressure
- Seal edge with slight pressure
- Trim wick to 1/2 inch
Beeswax Food Wraps
Ingredients:
- 100% cotton fabric
- 1/4 cup beeswax pellets
- 2 tablespoons jojoba oil
- 2 tablespoons pine rosin
Instructions:
- Cut fabric into desired sizes
- Sprinkle wax mixture evenly
- Heat in oven at 185°F (85°C)
- Brush to distribute evenly
- Cool and cure for 24 hours
Basic Moisturizing Cream
Ingredients:
- 1/4 cup beeswax
- 1/2 cup almond oil
- 1/4 cup coconut oil
- 1 teaspoon vitamin E
- Essential oils (optional)
Method:
- Melt beeswax and oils together
- Remove from heat at 170°F (77°C)
- Add vitamin E and essential oils
- Whip until creamy
- Pour into containers
Furniture Polish
Ingredients:
- 1 part beeswax
- 3 parts olive oil
- 10 drops lemon essential oil
Instructions:
- Melt beeswax slowly
- Add olive oil and stir
- Add essential oil
- Pour into container
- Allow to solidify
4. Advanced Recipes
Natural Mascara
Ingredients:
- 2 teaspoons beeswax
- 4 teaspoons aloe vera gel
- 1-2 capsules activated charcoal
- 1/4 teaspoon coconut oil
Method:
- Melt beeswax and coconut oil
- Add activated charcoal
- Whisk in aloe vera gel
- Pour into clean mascara tube
- Let set for 24 hours
Foundation Base
Recipe:
- 2 tablespoons beeswax
- 2 tablespoons argan oil
- 1 teaspoon cocoa powder
- Mineral pigments as needed
Steps:
- Melt beeswax with oil
- Add cocoa powder
- Mix in mineral pigments
- Test color on skin
- Adjust as needed
Hot Process Soap
Ingredients:
- 16 oz coconut oil
- 14 oz olive oil
- 2 oz beeswax
- 4.7 oz lye
- 10 oz water
Safety Note: Always add lye to water, never water to lye!
Process:
- Prepare lye solution
- Melt oils and beeswax
- Combine at 160°F (71°C)
- Cook until translucent
- Mold and cure
5. Additional Beeswax Projects
Solid Lotion Bars
Ingredients:
- 1 part beeswax
- 1 part shea butter
- 1 part coconut oil
- Essential oils (optional)
- Vitamin E oil (optional)
Instructions:
- Melt ingredients in double boiler
- Add essential oils and vitamin E
- Pour into silicone molds
- Cool completely (about 2 hours)
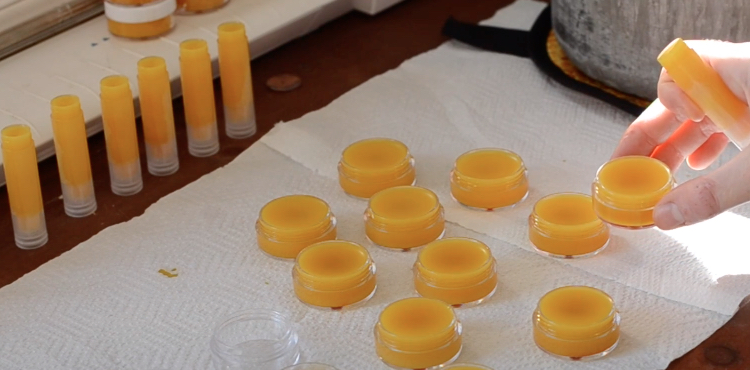
- Store in tins
Beard Balm
Ingredients:
- 2 oz beeswax
- 2 oz shea butter
- 1 oz jojoba oil
- 1 oz sweet almond oil
- Essential oils (cedar, sandalwood)
Method:
- Melt wax and butter
- Add carrier oils
- Add essential oils
- Pour into tins
- Cool completely
Leather Conditioner
Recipe:
- 1 part beeswax
- 2 parts coconut oil
- 1 part sweet almond oil
- Essential oils (optional)
Instructions:
- Melt ingredients together
- Pour into wide-mouth jar
- Let solidify
- Apply with cloth
- Buff into leather
Cutting Board Conditioner
Ingredients:
- 1 oz beeswax
- 4 oz mineral oil
- 5 drops lemon essential oil
Process:
- Melt beeswax
- Add mineral oil
- Add essential oil
- Pour into jar
- Apply monthly to boards
6. Recipe Ratios and Measurements
Basic Skincare Ratios
| Product Type | Beeswax | Liquid Oil | Butter |
|---|---|---|---|
| Basic Balm | 1 part | 3 parts | 1 part |
| Firm Salve | 1 part | 4 parts | – |
| Lotion Bar | 1 part | 1 part | 1 part |
| Body Butter | 1 part | 2 parts | 2 parts |
Candle Ratios
| Type | Beeswax | Additives | Wick Size |
|---|---|---|---|
| Pure | 100% | – | #4-6 |
| Container | 90% | 10% oil | #4-5 |
| Pillars | 100% | – | #6-8 |
Food Wrap Ratios
| Size | Beeswax | Jojoba Oil | Pine Resin |
|---|---|---|---|
| 12″×12″ | 2 tbsp | 2 tsp | 1/2 tsp |
| 8″×8″ | 1 tbsp | 1 tsp | 1/4 tsp |
7. Troubleshooting Guide
Quick Reference Chart for Common Problems
| Problem | Causes | Quick Fix | Prevention |
|---|---|---|---|
| Wax Won’t Melt | • Temperature too low • Poor heat distribution | • Increase to 165°F • Use double boiler | • Use proper equipment • Monitor temperature |
| Grainy Texture | • Cooling too fast • Uneven heating | • Remelt slowly • Cool at room temp | • Control cooling rate • Heat evenly |
| Too Soft | • Not enough wax • Too many oils | • Add 5-10% more wax • Reduce oils | • Follow recipes exactly • Test small batches |
| Too Hard | • Too much wax • Not enough oil | • Add more oil • Reduce wax % | • Balance ratios • Test consistency |
Project-Specific Solutions
Candle Issues
- Tunneling: Use larger wick, ensure full melt pool
- Smoky Flame: Trim wick to 1/4″, check wax purity
- Won’t Light: Clear wick of wax, adjust wick size
Food Wrap Problems
- Too Sticky: Iron between paper, reduce wax
- Not Sticky: Add more wax, check temperature
- Uneven Coating: Reheat and spread evenly
Skincare Issues
- Grainy: Remelt slowly, cool gradually
- Separating: Whisk while cooling
- Too Greasy: Increase wax ratio
8. Temperature Guidelines
Critical Temperature Points
| Process | Temperature | Notes |
|---|---|---|
| Melting Wax | 160-175°F (71-79°C) | Never exceed 185°F |
| Adding Scent | 185°F (85°C) | Essential oils |
| Pouring Candles | 165-170°F (74-77°C) | Container temp 70°F |
| Food Wraps | 185°F (85°C) | Even distribution |
| Skincare | 170°F (77°C) | Prevent separation |
Seasonal Adjustments
Summer Formulations (Above 75°F/24°C)
- Increase beeswax by 5-10%
- Reduce liquid oils accordingly
- Consider adding carnauba wax (5%)
Winter Formulations (Below 65°F/18°C)
- Decrease beeswax by 5-10%
- Increase liquid oils accordingly
- Add more butter for stability
9. Storage and Shelf Life
Storage Guidelines by Product Type
| Product | Storage Temp | Container | Shelf Life |
|---|---|---|---|
| Candles | Room temp | Dark place | Indefinite |
| Food Wraps | Cool, dry | Rolled/flat | 6-12 months |
| Skincare | Below 75°F | Air-tight | 6-12 months |
| Balms | Cool, dark | Sealed tins | 12 months |
| Soaps | Room temp | Well-ventilated | 12 months |
Best Practices for Storage
- Container Selection:
- Glass for hot-pour items
- Metal tins for balms
- Plastic for mild products
- Dark containers for light-sensitive items
- Environment Control:
- Avoid direct sunlight
- Maintain steady temperature
- Control humidity
- Provide proper ventilation
- Product Life Extension:
- Add vitamin E to oils
- Use preservatives when needed
- Label with date made
- Store properly sealed
10. Professional Tips and Best Practices
Quality Control
- Always test small batches first
- Document everything:
- Temperatures
- Ratios
- Results
- Adjustments
- Use consistent measuring methods
- Label all test batches
Scaling Recipes
- Use weight, not volume
- Maintain exact ratios
- Test each new batch size
- Allow for waste/loss
Safety Protocols
Fire Safety:
- Keep extinguisher nearby
- Never leave melting wax unattended
- Use proper equipment
- Monitor temperatures
Personal Protection:
- Wear heat-resistant gloves
- Use eye protection
- Ensure good ventilation
- Keep first aid kit handy
Cleanup Tips
- Clean tools while warm
- Use paper towels first
- Hot soapy water second
- Dedicated cleaning supplies
- Proper disposal methods
Resources and Further Reading
- Start with quality materials – see my guide on selecting and purchasing pure beeswax
- Join local beekeeping groups
- Attend workshops
- Connect with experienced crafters
Final Notes
Remember:
- Start simple
- Build skills gradually
- Keep good records
- Learn from mistakes
- Experiment carefully
- Focus on quality
There you have it – your gateway to natural, sustainable living through DIY beeswax crafting! Remember, practice makes perfect, and don’t be afraid to experiment with these recipes to make them your own.
Start with simple projects like food wraps or lip balm, then work your way up to more complex creations. Your journey to a more sustainable, natural lifestyle starts here. With practice and patience, you’ll develop your own signature techniques and recipes. Happy crafting!


