Welcome, handy honey enthusiasts and woodworking wizards! So, you’ve decided to combine your love for bees with your passion for DIY?
Brilliant! Building your own beehive is like creating a five-star hotel for insects – but with more buzz and less room service. Did you know that a well-built DIY hive can last over a decade? That’s longer than most human relationships!
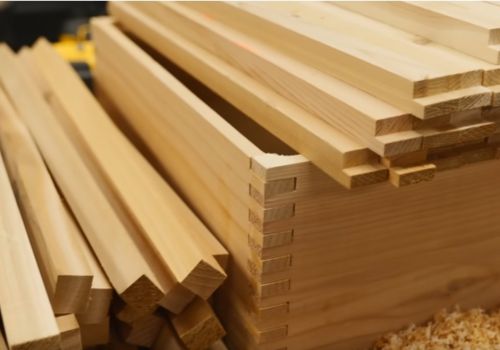
In this guide, we’ll walk you through plans for the most popular hive types, turning you from a humble woodworker into a master bee architect. So, grab your safety goggles, fire up that saw, and let’s get ready to build some bee mansions!
- Langstroth Hive: The Classic Choice
- Top Bar Hive: The Natural Approach
- Warre Hive: The "People's Hive" Project
- Observation Hive: See-Through Bee Home
- Nuc Box: Your Bee Nursery
- Swarm Trap: Catch Your Own Bees
- Creative Hive Designs: Thinking Outside The Box
- Essential Hive Components: DIY Additions
- Weatherproofing Your Creation
- Advanced DIY: Tech-Integrated Hives
- The Final Buzz
Langstroth Hive: The Classic Choice
When I first built a Langstroth hive, I thought it’d be as easy as assembling a bookshelf. Turns out it wasn’t as easy as I thought. But don’t worry, I’ve made all the mistakes so you don’t have to.
Materials List And Tools Needed
- Wood (pine or cedar)
- Wood glue
- Screws or nails
- Waterproof paint or preservative
- Hammer or drill
- Saw
- Measuring tape
- Square
Video Tutorial on How To Build A Langstroth Hive
It’s much easier learning how to build anything if there are videos tutorials so I’ve included a couple good ones.
Step-By-Step Construction Guide
Start with the bottom board – it’s the foundation. Cut pieces to size, then assemble using glue and screws. Next, the brood box. Cut pieces carefully, ensuring they’re square. I once rushed this and ended up with a wonky box. Bees built comb in crazy directions!
Don’t forget frame rests. I like to cut a rabbet on the top edges of the box. For covers, I prefer a telescoping cover with an inner cover. It’s like giving your bees an insulated roof.
Tips For Perfect Frame Fit
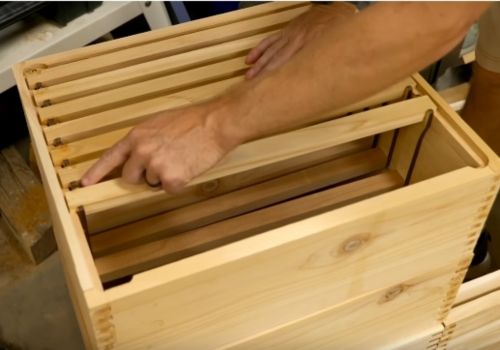
Frames are crucial. Too tight, and you’ll wrestle with them every inspection. Too loose, and bees will glue everything with propolis. I use a frame-building jig for consistency.
Remember bee space – about 3/8 inch between components. Any more or less, and bees will fill it with comb or propolis.
Always paint or treat your wood. I skipped this once, and that hive didn’t survive its first rainy season. Use bee-safe exterior paint or preservative.
Building your own Langstroth is rewarding but tricky. Take your time, measure carefully, and don’t be afraid to start over. You’re building a home for thousands of tiny occupants!
And hey, if all else fails, there’s no shame in buying pre-made. Sometimes, the best DIY project is the one you don’t do yourself!
Top Bar Hive: The Natural Approach
When I first heard about top bar hives, I thought, “How hard can it be? It’s just a long box with sticks on top!” Oh, how naive I was. But don’t worry, I’ve bumbled through it so you don’t have to!
Video Tutorial on How To Build A Top Bar Hive
Here is a good DIY Top Bar beehive video
Selecting The Right Wood For Top Bars
Selecting wood for top bars is crucial. Get it wrong, and you’ll have comb going every which way. Use straight-grained, untreated wood like cedar or pine. Bars should be about 1 3/8 inches wide – that’s the magic number for bee space.
I cut a small groove down the center of each bar and coat it with beeswax. It’s like giving bees a roadmap for comb building.
Building The Hive Body And Roof
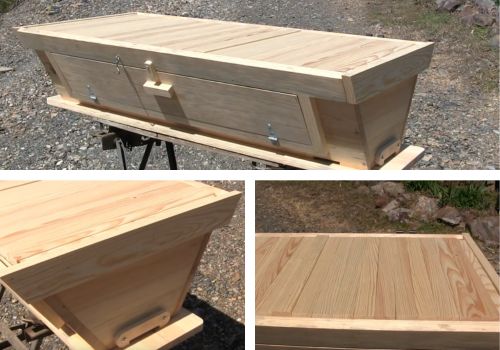
The hive body is a long, trapezoidal box. Why trapezoidal? It mimics natural honeycomb shape and discourages bees from attaching comb to sides. I once made a rectangular one – removing side-attached combs was not fun!
For the roof, go waterproof and well-insulated. I use a pitched roof with good overhang. It’s like giving bees a cozy cabin in the woods. Make sure it’s easy to lift for inspections.
Creating Bee-Friendly Entrance Options
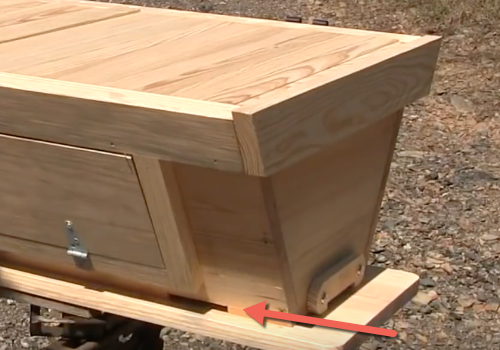
Entrances should mimic nature. I drill a few 1-inch holes near one end. Pro tip: make these easy to close off. I use corks after a skunk discovered my hive’s all-you-can-eat buffet!
Remember, it’s about working with bees’ natural instincts. Provide a space that feels like home. Your first hive might not be perfect – mine looked like it was designed by drunk carpenters. But the bees didn’t mind, and I learned a lot.
Building a top bar hive is like jazz – improvisation within a framework. So grab your tools, channel your inner bee, and get ready for an adventure.
Warre Hive: The “People’s Hive” Project
When I first heard about Warre hives, I thought, “Great, another design to confuse me!” But building one is like creating a cozy, vertical bee condo. It’s all about mimicking nature while keeping things simple.
Constructing Stackable Boxes
Start with stackable boxes – the heart of the Warre hive. Think bee apartments. Consistency is key; I once made slightly different sized boxes and stacking them was like a frustrating game of Jenga!
Use square boxes, typically 12 inches each way and 8 inches deep. I use untreated pine. The top edges need rabbets for top bars to rest on – like tiny shelves for bee furniture.
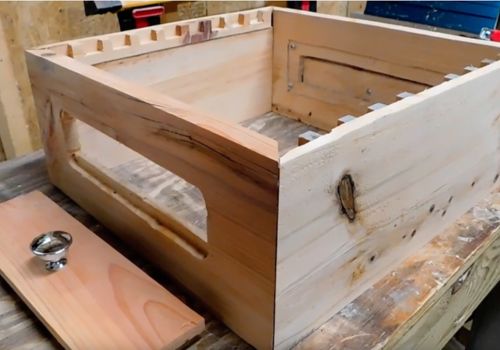
Pro tip: make more boxes than you think you’ll need. Bees can be ambitious builders!
Making Quilt Boxes For Insulation
Next, the quilt box – a warm, fuzzy hat for your hive. It helps with moisture control and insulation. I fill mine with wood shavings, using breathable cloth on the bottom. Make sure it has plenty of small holes for ventilation. My first attempt became a moldy mess due to poor airflow!
DIY Viewing Windows Installation
Viewing windows are optional but cool – like bee TV in your backyard! I use plexiglass set into a frame on one box side. Ensure it’s snug and light-tight when closed. My first attempt let bees tour my garden unexpectedly. Now I use weatherstripping for a good seal.
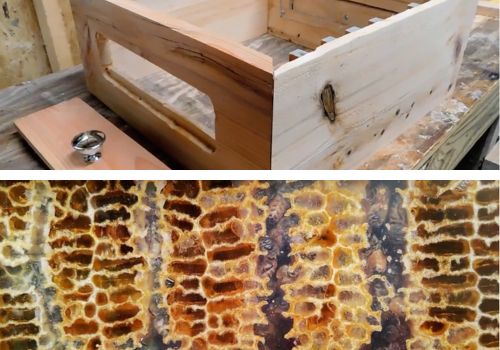
Remember, Warre hive beauty is in simplicity. Don’t obsess over perfection; bees are forgiving architects.
It’s like creating a bee-friendly LEGO set – stackable, interchangeable parts making a happy bee home.
Be prepared for odd looks from neighbors as you assemble your tiny wooden skyscraper. But that’s part of the beekeeping fun!
Observation Hive: See-Through Bee Home
When I first built an observation hive, I thought I was creating a bee aquarium. But it’s more like setting up a reality TV show for bees.
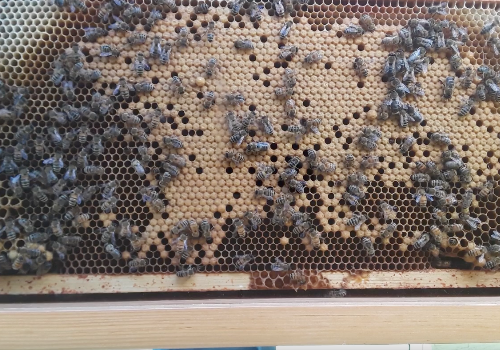
Video Tutorial on How To Build A Temporary Observational Hive
Here is a cool video I found of someone who built a temporary observation hive from a shadow box
Choosing The Right Glass Or Plexiglass
First, choosing the right glass or plexiglass is crucial. My first attempt I used regular window glass. One bump later, and I had a very exciting afternoon chasing bees around my living room! Now I use tempered glass or high-quality plexiglass. It’s like giving your bees a shatterproof shield.
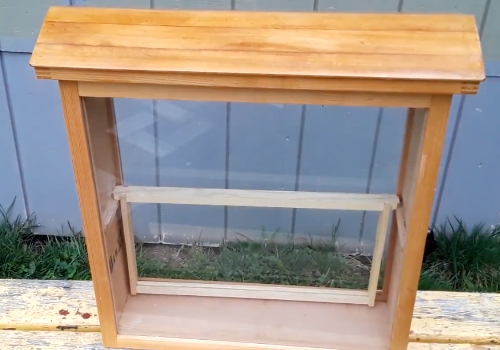
Frame Design For Easy Observation
Frame design is where the magic happens. I design frames with extra space around the edges, like giving bees a hallway to walk in. Make frames removable for easy cleaning – bee life can get messy!
Ventilation Tricks For Indoor Use
Ventilation is super important, especially for indoor hives. My first indoor hive turned into a bee sauna – not ideal! I now use small ventilation holes covered with fine mesh. It’s like giving your bees air conditioning. For indoor hives, consider a tube to the outside for bee entry and exit.
Temperature control is crucial. I use a small fan nearby to help circulate air. It’s like giving your bees their own personal breeze.
Remember, an observation hive is a living, buzzing ecosystem. Provide enough space for the colony to grow and store honey. I once made one too small, and it looked like a tiny, fuzzy mosh pit!
Building an observation hive is like creating a miniature bee city in your home. It’s fascinating, educational, and sometimes nerve-wracking. But there’s nothing quite like watching a queen lay eggs or seeing workers build comb right before your eyes.
Nuc Box: Your Bee Nursery
When I first heard about nuc boxes, I thought they were nuclear-powered beehives. Turns out, it’s just short for “nucleus” – a starter home for bees. Building my first nuc was like creating a bee nursery, complete with excitement and occasional panic!
Video Tutorial on How To Build A 5 Frame Nuc for Bees
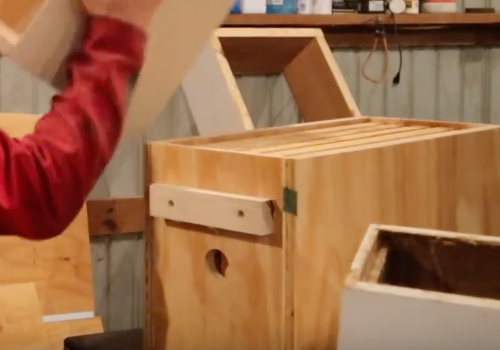
Simple 5-Frame Nuc Plans
For a simple 5-frame nuc, think miniature Langstroth hive. Use untreated pine, about 9 5/8 inches deep, 8 inches wide, and 19 7/8 inches long. Pro tip: Make the entrance smaller than a regular hive – I use a 3/4 inch hole. It’s like giving your bees a peephole to check visitors.
Converting Nucs To Full Hives
Here’s where I goofed up: I made my first nuc exactly five frames wide. Bees need wiggle room! Now I add about a quarter inch extra space. It’s like giving bees elbow room at the dinner table.
Converting nucs to full hives is where the magic happens. Time it right – transfer when they’re bursting at the seams, but before they swarm. I add a frame or two of foundation before transferring – a gentle nudge towards a bigger home.
Transportable Design Tips
For transportable design, think light and secure. Add handles – it’s like giving your bee suitcase a comfy grip. Ensure the lid is snug but not airtight. I learned about secure lids the hard way – once had a very exciting drive home with a loose top! Now I use a strap or latch.
A good nuc box is versatile. I’ve used mine for catching swarms, raising queens, and as a temporary home for splits. It’s the Swiss Army knife of beekeeping equipment. Building a nuc box is like creating a bee starter kit. It’s simple, useful, and rewarding.
Swarm Trap: Catch Your Own Bees
When I first heard about swarm traps, I thought it was some bee prank. Turns out, it’s like fishing for bees – and just as exciting as landing a big catch!
Video Tutorial on DIY Swarm Traps
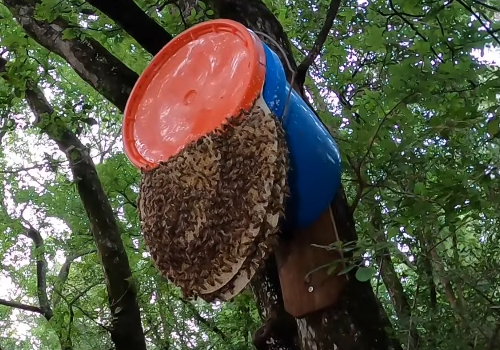
Here is a great video of a bunch of DIY swarm traps that don’t cost a lot of money!
Optimal Size And Shape For Attracting Swarms
For size, think 40 liters – that’s what bees prefer. I made my first trap too small, like trying to cram a family into a studio apartment. No takers!
Shape-wise, go tall and narrow, about 18 inches tall and 12 inches square. It’s like a high-rise condo for bees. Put the entrance near the bottom – bees prefer a ground-floor lobby.
Scent Lure Integration In Design
Scent lure is key. Rub the inside with beeswax and a drop of lemongrass oil. It’s like creating a bee air freshener. My first attempt was overzealous – I’m sure I could smell it from the next county! Adding a frame of old comb is like staging a house for sale.
Easy-Mount Features For Trees
For mounting, think lightweight but sturdy. I use plywood with a slanted, overhanging roof – it’s a landing pad for scout bees. Attach a strong rope or strap for hanging. I once used flimsy string and, well, gravity isn’t forgiving with boxes full of bees. Now I use a ratchet strap.
Hang traps 10-15 feet high. Any higher and you’ll need mountaineering gear to retrieve them. I learned this the hard way, channeling my inner Tarzan for a trap hung too high.
Patience is crucial. Sometimes you’ll catch a swarm in days, sometimes weeks. I once got so impatient, I considered hiring a bee realtor!
When you do catch a swarm, it’s thrilling. Be prepared for strange looks as you carry a buzzing box through your neighborhood. It’s all part of the adventure!
Swarm trapping is like playing matchmaker for bees and their new home. It’s fun, eco-friendly, and addictive. Just don’t be surprised if you check your traps obsessively like a kid on Christmas morning. Welcome to the world of swarm catching!
Creative Hive Designs: Thinking Outside The Box
When I started beekeeping, I thought hives had to be boring boxes. Wow, was I wrong! Let me tell you about some wild ideas I’ve tried – some brilliant, some… learning experiences.
Hexagonal Hive Plans
First, hexagonal hive plans. I built a hive shaped like a giant honeycomb cell. Looked amazing, but inspecting frames in a six-sided box is like playing Tetris with angry insects. I felt like a contortionist during hive checks! The bees loved it, though. It was like a bee-themed fun house.
Combination Hive Designs (Langstroth-Top Bar Hybrid)
Next, combination hive designs. I tried merging a Langstroth with a top bar hive. Picture a Langstroth bottom with a top bar attic. In theory, the best of both worlds.
In practice? Like merging two different families under one roof. The bees were confused, I was confused, and harvesting honey was a nightmare. But it taught me a lot about bee behavior and hive design.
Decorative Hive Exteriors
Now, decorative hive exteriors – this is where the fun begins. I once painted a hive to look like a miniature Buckingham Palace, complete with tiny guard bees. Another time, I made a hive look like a giant flower. The bees appreciated the irony, but repainting petals every spring wasn’t fun.
One caution: ensure your artistic vision doesn’t interfere with hive function. I once added so many decorative elements that I needed a crowbar to open the roof!
Remember, while creative designs are fun, bees’ needs come first. Proper ventilation, protection from elements, and ease of inspection are priorities. I learned this when my beautiful but poorly ventilated “bee castle” turned moldy.
Thinking outside the box can be incredibly rewarding. It allows creativity while providing a home for bees. Just be prepared for trial and error, and raised eyebrows from traditional beekeepers.
Who knows? Your crazy idea might be the next big thing in beekeeping. Just be ready to explain why your hive looks like a spaceship or giant banana!
Essential Hive Components: DIY Additions
When I started beekeeping, I thought I’d buy everything. Then I saw the price tags and thought, “I can build that!” Let me tell you about my DIY adventures – some brilliant, some… character-building experiences.
Building Your Own Frames
Building frames seemed easy enough. My first batch looked like a drunken carpenter’s work. The bees built comb in ways I didn’t think possible. Now I use a jig to ensure everything’s square. Pro tip: Use hard woods like poplar or oak. I once used soft pine – those frames sagged faster than my Monday motivation.
Constructing Feeders And Entrance Reducers
Constructing feeders was another adventure. My first one leaked like a sieve. I had very sticky, confused bees for days. Now I use a design with a floating platform – a bee life raft in a syrup sea. Just ensure it actually floats. I once used wood too heavy, creating a “sinking platform.”
Entrance reducers seemed simple. My first attempt was too thick – poor bees had to climb Mount Everest to get home. Now I make them thinner with a nice slope. It’s like a welcome mat and front porch in one.
Making Screened Bottom Boards
Making screened bottom boards got interesting. My first attempt had holes big enough for bees to escape. It was more playground than floor. Now I use the right mesh size, securely attached. Be careful though – I once stapled right through my glove. Nothing like a DIY project doubling as acupuncture!
Remember, precision is key. Bees are tiny, fuzzy engineers noticing every flaw. I once made frames a quarter inch too wide. The bees got creative – it looked like abstract art in there!
DIY components can save money and give a sense of accomplishment. Just be prepared for trial and error. And maybe invest in a good first aid kit. You never know when you might need to remove a splinter or two.
Weatherproofing Your Creation
When I started beekeeping, I thought a coat of paint was all I needed to protect my hives. Wow, was I in for a soggy surprise! Let me share some weatherproofing wisdom – some from clever planning, some from “unplanned water features.”
Natural Vs. Chemical Wood Treatments
On wood treatments: I started with chemical preservatives, thinking I’d create an impenetrable fortress. Turns out, bees hate that new-hive chemical smell. Now I use natural options like linseed or tung oil. It’s like giving your hive a natural raincoat.
Pro tip: Never use motor oil. My bees smelled like a gas station and probably wanted tiny leather jackets!
Proper Painting Techniques For Hives
For painting, thin, even coats are key. Let each dry before adding another! I once got impatient and ended up with a melting-looking hive. Use light colors to reflect heat. I learned this after creating a bee sauna with dark brown paint.
Creating Effective Roof Designs
Now, good roof designs keep everything underneath dry and happy. My first roof was flatter than a pancake, resulting in a very moist colony. Now I use a pitched roof with a good overhang – like a front porch for bees. Secure it well; finding your roof in a neighbor’s yard is an awkward conversation starter.
Consider adding a metal layer on top. It’s like a hive umbrella. But be careful – I once burned my hand on a July-hot metal roof. Always wear gloves! Don’t forget ventilation. Add small, mesh-covered holes near the top. It’s like giving your bees a cross-breeze without creating a wind tunnel.
Good weatherproofing balances protection and breathability. It’s part science, part art, and lots of learning from soggy mistakes.
Advanced DIY: Tech-Integrated Hives
When I first heard about tech-integrated hives, I thought, “Great, now I need a computer science degree to keep bees!” But adding gadgets to your hives can be fun and useful – if you don’t electrocute yourself first.
Installing Temperature And Humidity Sensors
Temperature and humidity sensors seemed simple enough. Turns out, it’s tricky with thousands of curious, stinger-equipped inspectors. My first attempt became a propolis art project. Now I use small, waterproof sensors tucked discreetly in the hive. It’s like giving bees a high-tech mood ring. Just seal any wire entry points – I once left a tiny gap and got a hive full of confused ants.
Building In Weight Scales For Honey Flow Monitoring
Weight scales for honey flow monitoring are game changers! I started with a basic bathroom scale under my hive. Accuracy was… questionable. Now I use proper hive scales – it’s like a 24/7 honey production report. Word of caution: Secure your scale well. I once had a hive tip over because the scale wasn’t level. Nothing like chasing a runaway hive downhill!
Creating App-Controlled Ventilation Systems
App-controlled ventilation systems get really sci-fi. I rigged up small fans controlled by my phone. Feeling smug, I demonstrated to a fellow beekeeper… and promptly blew half my bees out of the hive. Now if I use one I use gentler system with larger, slower fans. It’s like bee climate control. Remember to have a manual override!
Integrating gadgets can be tricky. Waterproofing is crucial – bees and electronics mix like oil and water. Power is another consideration. Solar panels work great, but don’t let them shadow your hive entrance.
Remember, tech is cool, but no substitute for hive checks. I once got so caught up in app readings that I missed a queen issue for weeks.
The Final Buzz
Congratulations, you’ve just graduated from Bee Architecture 101! Armed with these plans, you’re ready to build a bee paradise that would make Frank Lloyd Wright jealous.
Remember, the best hive is one that keeps your bees happy and healthy, whether it’s a simple Top Bar or a high-tech Langstroth with more gadgets than a James Bond car.
As you embark on your DIY beehive adventure, remember to measure twice, cut once, and always keep your bees’ needs in mind. Now go forth, create, and may your homemade hives be filled with happy bees and lots of honey!

