Ready to pour some creativity into your beeswax candle making? You’re in for a treat! Did you know that the ancient Egyptians used reed molds to shape their beeswax candles as far back as 3000 BC?
Talk about a bright idea! Today, we’re diving into the fascinating world of beeswax candle molds. Whether you’re dreaming of elegant tapers, quirky shapes, or perfectly smooth pillars, there’s a mold out there waiting to bring your vision to life.
So, let’s wax poetic about the endless possibilities of shaping liquid gold into illuminating works of art. Grab your wick and let’s get molding!
Types Of Beeswax Candle Molds: A Shape For Every Occasion
Let me tell you, when I started making beeswax candles, I had no idea there were so many mold options! It’s like a whole world of shapes out there.
Traditional Taper And Pillar Molds
These are the classics. I remember my first attempt at a taper – it looked more like a wonky stick than a candle! But practice makes perfect. Pillars are great for beginners, nice and sturdy. Pro tip: silicone molds are easier to use than metal ones.
Container Candle Molds: From Jars To Teacups
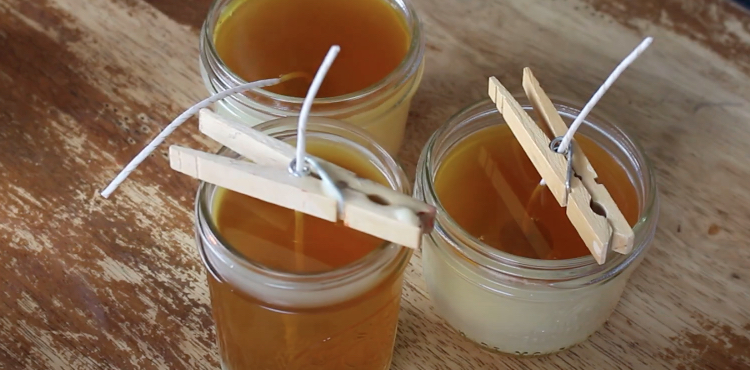
This is where you can get creative. I’ve poured candles into everything from mason jars to vintage teacups. Once, I even used an old boot! Just make sure whatever you use can handle the heat of melted wax.
Novelty And Seasonal Shape Molds
Oh boy, these are fun! I’ve made Christmas tree candles, heart-shaped ones for Valentine’s Day, even little pumpkins for fall. Kids love these. Just be careful with intricate shapes – they can be tricky to get right.
Freeform And Artistic Mold Options
This is where things get wild. I’ve experimented with sand molds and even ice molds! It’s hit or miss, but when it works, the results are stunning. Great for making unique gifts.
Multi-Cavity Molds For Batch Production
When I started selling my candles, these were a lifesaver. You can make a bunch of smaller candles all at once. Just watch out for air bubbles – they love to hide in these molds.
Remember, half the fun is in experimenting. Don’t be afraid to try new shapes and ideas!
Preparing Your Molds For Perfect Beeswax Candles
Let me tell you, getting your molds ready for beeswax candles can make or break your final product. I learned this the hard way when I first started out. My candles looked like a hot mess because I skipped some crucial steps. But don’t worry, I’ve got you covered with what I’ve learned over the years.
Cleaning And Sanitizing Different Mold Types
First things first, you gotta clean those molds. For silicone molds, I use warm soapy water and a soft brush. Metal molds? A quick wipe with rubbing alcohol does the trick. Just make sure they’re bone dry before using.
Applying Mold Release Agents: When And How
Now, this is where I messed up a lot at first. Beeswax can be sticky, so a mold release agent is your best friend. For silicone, a light spritz of silicone spray works wonders. With metal molds, I swear by a thin layer of mineral oil applied with a lint-free cloth.
Preheating Molds For Smoother Finishes
Here’s a pro tip: warm up those molds! I pop mine in a low oven (around 100°F) for a few minutes. This helps the wax flow better and reduces those pesky air bubbles.
Securing Wicks In Various Mold Styles
Wick placement is crucial. For container candles, I use a dab of hot glue. In pillar molds, I thread the wick through the hole and secure it with a washer or wick bar. Always keep it centered!
Tips For Preventing Air Bubbles And Imperfections
To avoid bubbles, pour your wax slowly and at the right temperature. I aim for around 160°F. Give the mold a gentle tap on the counter to release any trapped air. And remember, patience is key – let those candles cool slowly for the best results.
Pouring Techniques For Different Beeswax Candle Molds
I’ve poured a ton of beeswax candles, and trust me, it’s not just about dumping wax in a mold. There’s a real knack to it that I’ve picked up over time.
Single Pour Vs. Layer Pouring Methods
At first, I thought single pours were the way to go. But for bigger candles, I’ve found layering works better. It stops those annoying sink holes that can pop up as the wax cools down.
Temperature Considerations For Various Mold Materials
This one’s crucial. I pour at about 160°F for silicone molds and bump it up to 175°F for metal ones. Get it wrong and you’re in for a world of cracks and weird textures.
Techniques For Filling Intricate Mold Designs
Intricate molds used to drive me nuts. Now I pour slow and tilt the mold to get wax into all the little details. Sometimes I’ll even use a toothpick to guide it along.
Adding Embeds And Layers In Transparent Molds
Here’s where you can get fancy. I like to pour a thin layer, let it set a bit, then add some dried flowers. Pour another layer and bam! It looks awesome in clear molds. Just make sure everything’s dry to avoid weird reactions.
Troubleshooting Common Pouring Issues
We’ve all dealt with cracks, bubbles, and uneven surfaces. For cracks, try a slightly lower temp. Bubbles? Tap the mold gently as you pour. And for uneven tops, a heat gun can work wonders.
Remember, practice makes perfect. Don’t get discouraged if your first few attempts aren’t great. Keep at it and you’ll be making gorgeous candles in no time!
Unmolding And Finishing Your Beeswax Candles
I’ll never forget the first time I tried to unmold a candle too soon. What a disaster! But over time, I’ve learned the tricks to getting it just right.
Proper Cooling Times For Different Mold Types
Patience is key here. For small silicone molds, I wait about 4-6 hours. Larger or metal molds? I give them a full 24 hours. It’s tempting to rush, but trust me, it’s worth the wait.
Techniques For Releasing Candles From Various Molds
With silicone molds, I gently flex them to break the seal. For metal or rigid molds, I pop them in the freezer for 15 minutes. The candle shrinks just enough to slide right out.
Finishing Touches: Trimming, Smoothing, And Polishing
This is where your candles really start to shine. I trim wicks to about 1/4 inch and use a heat gun to smooth any rough spots. For a glossy finish, I gently buff with a soft cloth.
Repairing Minor Imperfections After Unmolding
Don’t panic if you see small flaws. I keep some melted wax handy to fill in any tiny holes. For larger issues, a quick dip in warm wax can work wonders.
Storage And Care Of Your Finished Candles
Store your beauties in a cool, dark place. I wrap mine in tissue paper to prevent dust buildup. And here’s a tip: don’t store them in the bathroom – the humidity can mess with the wax.
Remember, each candle is unique. Embrace the little quirks – they show it’s handmade with love!
DIY And Custom Beeswax Candle Molds: Getting Creative
I’ve always been a bit of a DIY nut, and making my own candle molds has been awesome! Let me share some of my adventures in custom mold-making.
Creating Silicone Molds From Found Objects
One time, I found this cool seashell on the beach and thought, “Hey, that’d make a neat candle!” So I grabbed some food-grade silicone and gave it a shot. It turned out great! Just remember to use a release agent on your object first.
Carving Your Own Molds From Soap Or Plaster
Soap carving is tricky, but man, is it fun! I started with simple shapes and worked my way up. Plaster’s easier to work with, but it takes longer to dry. Either way, patience is key.
Upcycling Household Items Into Unique Molds
You wouldn’t believe the stuff I’ve turned into molds. Old milk cartons, plastic bottles, even a funky-shaped jello mold I found at a yard sale. Just make sure whatever you use can handle the heat of melted wax.
3D Printing Custom Candle Mold Designs
This one’s for the tech-savvy folks. I used a friend’s 3D printer and designed some wild shapes. The trick is using the right filament that can withstand hot wax.
Tips For Successful Homemade Mold Creation
Whatever method you choose, always test your mold with a small amount of wax first. And don’t get discouraged if your first attempts aren’t perfect. My early tries looked pretty wonky, but now I’m making candles that even my mom thinks are store-bought!
The Final Burn
Well, isn’t that illuminating? From ancient reeds to modern silicone, the world of beeswax candle molds is as vast as it is exciting.
Whether you’re crafting elegant tapers for a dinner party or whimsical shapes for holiday gifts, the perfect mold is out there waiting to shape your liquid gold into a work of art.
Each pour is an opportunity to learn and improve, so don’t be afraid to experiment with different molds and techniques. Why not challenge yourself to create a candle in a shape you’ve never tried before?
After all, the most beautiful light often comes from unexpected places. Happy molding, and may your beeswax creations always shine bright!


