Welcome, brave bee whisperers and hive huggers! So, you’ve set up your hive, and now it’s time for the moment of truth – your first inspection. Feeling a bit nervous?
Don’t worry, even seasoned beekeepers get butterflies (or should we say, bees) in their stomachs before popping that lid. Did you know that a typical hive inspection only takes about 15-30 minutes?
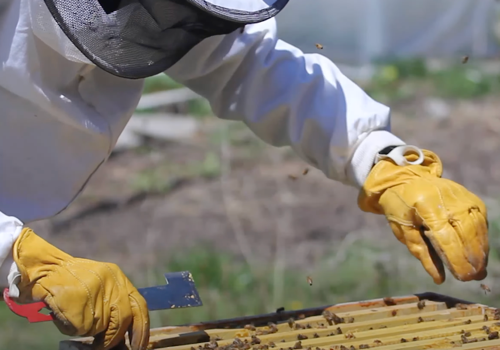
That’s right, in less time than it takes to watch a sitcom, you can check on the health and happiness of your buzzing buddies.
In this guide, we’ll walk you through each step of the inspection process, from suiting up to closing up. So, grab your hive tool, take a deep breath, and let’s dive into the fascinating world inside your hive!
- 1. Preparing for the Inspection: Gear Up and Get Ready
- 2. Approaching the Hive: First Observations
- 3. Opening the Hive: The First Look Inside
- 4. Frame by Frame: The Heart of the Inspection
- 5. Finding and Assessing the Queen
- 6. Checking for Pests and Diseases
- 7. Assessing Hive Resources
- 8. Wrapping Up the Inspection
- 9. Record Keeping: Documenting Your Findings
- 10. After the Inspection: Next Steps
- The Final Buzz
1. Preparing for the Inspection: Gear Up and Get Ready
Gearing up for a beehive inspection can be a bit nerve-wracking, but with the right prep, it’s a breeze. Trust me, I’ve had my share of fumbles over the years!
Essential Equipment Checklist
Let’s start with the essential equipment checklist. Trust me, you don’t wanna be halfway through an inspection and realize you forgot something important. Been there, done that, and it’s not fun!
A well-fitting beekeeping suit is a must. I learned that the hard way when I borrowed my friend’s oversized suit and looked like a deflated balloon in the apiary. Grab some good gloves too – I prefer nitrile for better finger control, but some people swear by leather.
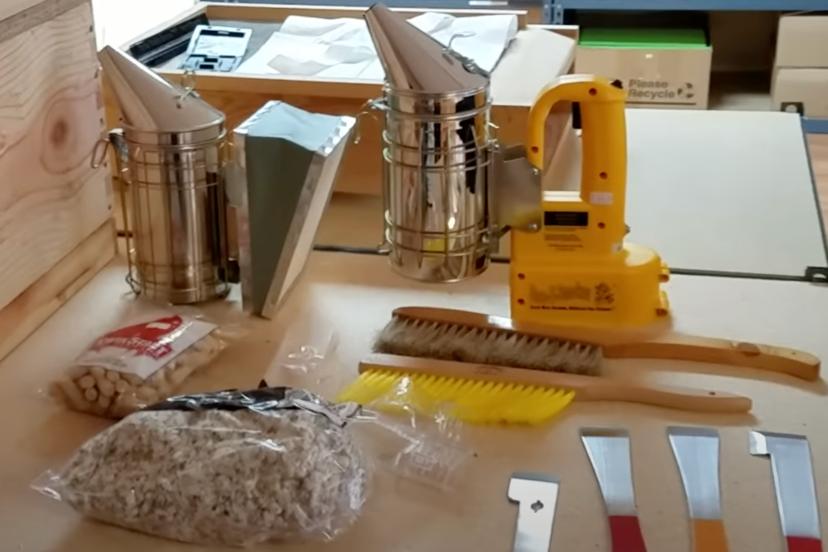
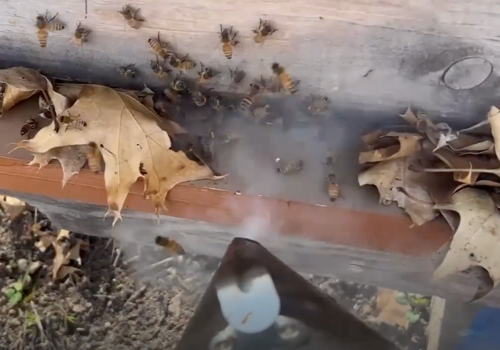
Your smoker is your best friend during inspections. I once forgot mine and, well, let’s just say my neighbors weren’t thrilled with all the commotion. Fill it with natural materials like pine needles or cardboard. And don’t forget a proper hive tool. This little gadget is a lifesaver for prying apart those sticky frames. I’ve tried using a regular screwdriver before, and let me tell you, it’s not the same.
Choosing the Right Time for Inspection
Timing is crucial for inspections. Aim for a warm, calm day between 10 am and 4 pm. Avoid windy days unless you fancy chasing frames across your yard (yep, been there). Also, steer clear of inspecting during a nectar dearth. Hangry bees are no joke!
Mental Preparation and Setting Goals
Mental prep is just as important as physical. I always take a few deep breaths before diving in. Set clear goals for your inspection – are you checking for the queen, looking for disease, or just doing a general health check? Having a plan keeps you focused and efficient.
Keep a notebook handy to jot down observations. You might think you’ll remember everything, but trust me after a few hives it all starts to blur together. Plus, tracking progress over time is super helpful.
Every inspection is a learning opportunity. I’ve had my fair share of mishaps – dropped frames, lost queens, you name it. But each mistake taught me something valuable.
Most importantly, enjoy the process! There’s something magical about opening up a hive and seeing all those busy bees at work. It never gets old, I tell ya.
So there you have it – my top tips for prepping for a beehive inspection. Get your gear ready, choose your time wisely, and go in with a clear head and a game plan. Happy beekeeping, folks!
2. Approaching the Hive: First Observations
You know, even after years of beekeeping, approaching the hive still gives me a little buzz of excitement. But before you pop that lid, take a moment to observe what’s happening outside. It’s like reading the back cover before diving into the book.
Observing External Hive Activity
First up, watch that hive entrance. You want to see steady bee traffic. If it’s a warm day and there’s not much activity, that could be a red flag. On the flip side, bees practically bumping into each other is usually a good sign.
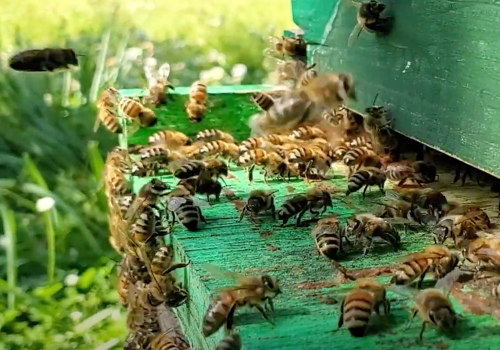
Keep an eye out for pollen. Bees bringing in pollen is usually a sign that there’s brood to feed. I once got all excited seeing tons of pollen coming in, thinking my hive was thriving. Turns out, it was actually robber bees from another colony! That taught me to look closer at the behavior, not just the pollen itself.
Listening to Hive Sounds
Now, let’s talk about hive sounds. A healthy hive has a contented hum, kinda like a distant lawnmower on a summer day. If you hear a high-pitched whine or angry buzz, take a step back. I learned that lesson the hard way and nearly set a new record for the 100-yard dash!
Checking for Signs of Trouble Outside the Hive
Don’t forget to check for trouble signs outside the hive. A few dead bees are normal, but piles could indicate pesticide issues or disease. Watch for little brown specks on the landing board too – could be varroa mite droppings.
Also, keep an eye out for bees acting weird. If they’re stumbling around or seem disoriented, it might be pesticide exposure. Oh, and don’t forget to check for any physical damage to the hive itself. Cracks, holes, or signs of animal interference could spell trouble. I once had a woodpecker decide my hive was the perfect drum set. Needless to say, the bees were not amused!
These external observations can give you valuable insights before you even open the hive. It’s like being a bee detective! Take your time, use all your senses, and don’t rush this part.
So there you have it, folks. My tips for approaching the hive and making those first observations. Happy beekeeping, and may your hives always be humming that sweet, contented tune!
3. Opening the Hive: The First Look Inside
You know, cracking open a hive still gives me a thrill, even after all these years. It’s like unwrapping a present, but with more potential for stings!
Using Smoke Effectively
First up, using smoke. Trust me, I learned the hard way that less is more. A few gentle puffs at the entrance and under the outer cover is all you need. I once went overboard and turned my hive into a bee sauna. Not my proudest moment!
Removing the Outer and Inner Covers
Lift the outer cover carefully and give a little puff of smoke under the inner cover. Wait about 30 seconds before removing the inner cover. This gives the bees time to gorge on honey, which makes them less likely to sting. It’s like how we’re less grumpy after a good meal, ya know?
Initial Assessment of Top Frames
Now, for that first look at the top frames. Take a deep breath and just observe. A healthy hive should have a pleasant, almost sweet smell. If something smells funky, pay attention. I once ignored a weird odor and ended up with a nasty case of foulbrood. Lesson learned!
Check out those bees. Are they calm or running around like it’s a bee disco? Calm bees usually mean a happy hive. Look at the wax cappings too. Light-colored ones usually mean fresh honey, while dark, spotty ones might indicate issues.
Don’t freak out if you see bees fanning their wings on top of the frames. That’s just their version of air conditioning. I used to think it meant an attack was coming. Talk about an overreaction!
You might spot the queen right away, but don’t sweat it if you don’t. She’s probably just playing hide and seek. I once spent an entire inspection looking for her, only to find her chilling on my suit afterward. Sneaky little royal!
Remember, this first look is just to get a general idea. Don’t go digging into frames yet. Take your time, observe, and let the bees tell you their story.
4. Frame by Frame: The Heart of the Inspection
It’s time to dive into the juicy center of your hive inspection. Brace yourselves for a thrilling game of “Frame, Frame, Who’s Got the Queen?”
Proper Technique for Removing Frames
When it comes to removing frames, I’ve learned the hard way that slow and steady wins the race. Use your hive tool to gently pry the frame loose, then lift straight up. No twisting or tilting, unless you want a bee mutiny on your hands!
I usually start with the second or third frame from the edge. Gives you some wiggle room, ya know? Once, I stubbornly started with the edge frame and ended up with a bee pancake. Not my proudest moment.
What to Look for on Each Frame
Now, what to look for? First, check the overall pattern. A good laying pattern should look like a solid, unbroken target. Spotty? Could mean queen trouble or disease.
Keep an eye out for the queen, but don’t panic if you don’t spot her right away. I once spent an entire inspection searching, only to find her chilling on my glove afterward. Sneaky gal!
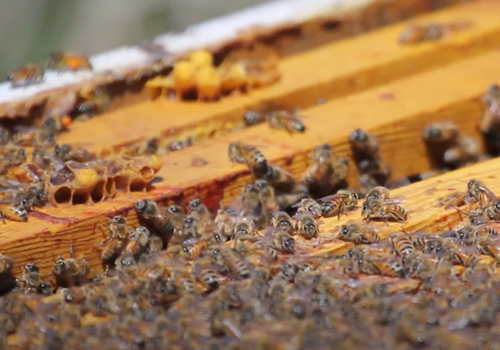
Now, what to look for? Each frame is like a page in the great bee novel. You’re searching for eggs (tiny white grains that’ll make you wish you’d brought a magnifying glass), larvae (groovy little grubs doing the backstroke in royal jelly), capped brood (baby bees tucked in their wax blankets), honey (liquid gold, baby!), and pollen (aka bee protein powder). It’s like a treasure hunt, but with more potential for stinging.
Identifying Different Types of Cells and Brood Stages
Now, let’s talk cell types. Worker brood cells are flat-capped and tan. Drone cells are bullet-shaped and stick out. Queen cells look like peanut shells hanging down. First time I saw one, I thought my hive had gone bananas!
For brood stages, you’ve got eggs, larvae (little white grubs), then capped brood. Healthy larvae should be pearly white and C-shaped. If they look off, that’s a red flag.
Don’t forget to check honey and pollen stores. A good mix is what you’re after. I once got so queen-obsessed that I missed my bees were running low on food. Oops!
Take your time with each frame. It’s not a race. I used to rush through, but slow and steady really does win in beekeeping.
And hey, jot down some notes. I keep a little waterproof notebook in my pocket. It’s been a lifesaver for tracking changes over time.
So there you have it, the nitty-gritty of frame-by-frame inspection. It might seem like a lot at first, but with practice, you’ll be reading those frames like a pro in no time. Happy hive diving!
5. Finding and Assessing the Queen
Finding that elusive queen can be like playing Where’s Waldo in a striped bee suit. I once spent so long looking that I nearly walked into a tree on my way back to the house!
Methods for Locating the Queen
Here’s a tip: work systematically. Start at one end of the hive and check each frame methodically. Don’t jump around like a kid after too much sugar – that’s a surefire way to miss her.
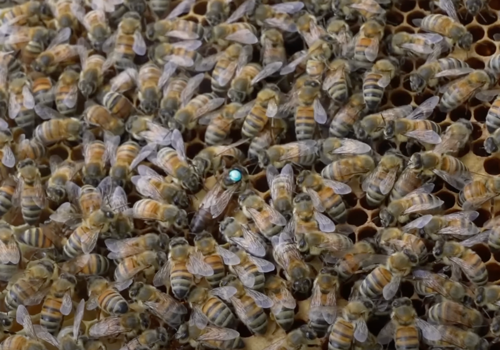
I use a queen marking pen these days. Makes her stand out like a lighthouse in a storm. Just be careful not to squish her when marking. I learned that lesson the hard way. RIP, Queen Beatrice.
Evaluating Queen Performance
For evaluating queen performance, it’s all about the brood pattern. You want a nice, solid pattern of capped brood – like a bullseye on a dartboard. Spotty or irregular? Your queen might not be up to snuff.
Keep an eye on her egg-laying too. A good queen should be pumping out eggs like there’s no tomorrow. Empty cells where there should be eggs? Might be time to consider requeening.
What to Do If You Can’t Find the Queen
Now, what if you can’t find the queen? Don’t panic! I used to freak out every time, but it’s not the end of the world. First, look for eggs. If you see fresh eggs, she was there in the last three days.
No eggs? Give it a week and check again. Sometimes queens just like to play hide and seek. I once had a queen so good at hiding, I nicknamed her Houdini!
If you still can’t find her after a couple of weeks, and there are no eggs or young larvae, it might be time for a new queen. But don’t rush – I’ve jumped the gun before and ended up with two queens duking it out. Talk about hive drama!
Remember, the bees usually know what they’re doing. If they need a new queen, they’ll often take care of it themselves. I’ve learned to trust their judgment more than my own sometimes.
Don’t beat yourself up if you can’t find the queen every time. Even pros struggle sometimes. Just stay calm, work systematically, and trust your bees. Happy queen hunting, folks!
6. Checking for Pests and Diseases
First up, the big baddies to watch for. Varroa mites are public enemy number one. These tiny vampires can decimate a hive faster than you can say “honey.” I learned that the hard way when I ignored some warning signs and lost a whole colony. Ouch!
Other troublemakers include small hive beetles, wax moths, and nosema. I once found a small hive beetle infestation and nearly jumped out of my suit. Those little buggers are speedy!
Performing a Varroa Mite Check
For varroa checks, I swear by the sugar shake method. It’s like giving your bees a powdered sugar spa day, but with a purpose. Scoop up about 300 bees, shake ’em in a jar with powdered sugar, and count the mites that fall through a mesh lid.
First time I tried this, I barely shook the jar, worried about hurting the bees. Ended up with a false low count and a sticky mess. Now I know better – give it a good shake, those girls are tougher than they look!
Identifying Healthy vs. Unhealthy Brood
When it comes to brood health, your eyes are your best tools. Healthy brood should look like a solid pattern of capped cells, like a perfectly toasted piece of bread. Spotty brood? Could be trouble.
Watch out for sunken or perforated cappings – might be American Foulbrood. Healthy larvae should be pearly white and plump. If you see discolored, shriveled, or twisted larvae, that’s a red flag.
Don’t forget your nose! A healthy hive smells pleasant, like warm wax and honey. Any foul odors could mean disease. I once ignored a funky smell, thinking it was just the neighbor’s compost. Big mistake!
If you spot signs of disease, don’t panic. Document what you see and consult with an experienced beekeeper or apiary inspector. Most problems can be managed if caught early.
Remember, regular inspections are key. It’s like going to the doctor, but instead of one patient, you’ve got thousands! I check my hives every couple of weeks during active season. Time-consuming? Sure. But it beats the alternative.
So there you have it, folks. The world of hive health checks in a nutshell. It might seem daunting, but with practice, you’ll be spotting those pests and diseases like a pro. When in doubt, ask for help. We beekeepers gotta stick together!
7. Assessing Hive Resources
Alright, let’s zip through assessing hive resources – it’s like being a bee accountant, but way more fun!
Evaluating Honey and Pollen Stores
Evaluating honey and pollen stores is crucial. I learned this the hard way when I found a cluster of starved bees one spring. Talk about a heartbreaker! Now, I always do the “lift test” during inspections. If the hive feels light as a feather, that’s a red flag. You want it to feel like you’re lifting your Uncle Bob after Thanksgiving dinner!
For a precise check, I look at the frames. Aim for at least 2-3 frames of honey per box during active season, more for winter. Pollen should be scattered around the brood nest like colorful polka dots.
Checking for Adequate Space
Checking for adequate space is like being a bee realtor. If bees are festooning between frames or bearding outside, they’re probably cramped. I once neglected to add a super in time and half my bees skedaddled! Now when 7-8 out of 10 frames are full, I know it’s time to expand.
Deciding Whether to Add or Remove Supers
Adding or removing supers is where you play bee architect. Add supers when about 70% of frames in the current box are drawn out and filled. But here’s a tip: add them before you think you need to. Bees are like teenagers – they grow faster than you expect!
Removing supers is trickier. You don’t want to take too much and leave the bees short for winter. I once got greedy and took too many off in late summer. Spent fall frantically feeding sugar syrup to make up for it. Oops!
Remember, every hive is different. I’ve got two side by side that need completely different management. It’s like having kids – no two are alike!
One last thing – we’re beekeepers, not bee robbers. Always leave enough for the bees. I once got so excited about a massive honey flow that I forgot this golden rule. Never again!
So there you have it, folks. Assessing hive resources is part science, part art, and a whole lot of learning from your mistakes. Keep your eyes open, your hives heavy, and your bees happy. Happy beekeeping!
8. Wrapping Up the Inspection
Alright, let’s talk about wrapping up a beehive inspection. I’ve been keeping bees for years now, and trust me, the end of an inspection is just as important as the start.
Reassembling the Hive Properly
Reassembling the hive properly is crucial. I learned this the hard way when I first started out. One time, I was so excited about seeing my queen that I rushed through putting everything back together. Big mistake. The next day, my bees were all confused and agitated.
Here’s the deal: put those boxes back in the exact same order you took ’em off. Start with the brood box at the bottom, then add your honey supers on top. Don’t forget the queen excluder if you’re using one. Pro tip: leave a small gap between frames. The bees need that space to move around.
Final Observations and Closing Thoughts
Now, final observations. This is where you really take stock of what’s going on in your hive. I always jot down some notes after an inspection. Look for signs of a healthy colony. Are your bees bringing in pollen? Did you spot the queen or see evidence of her laying? Any signs of disease or pests?
I once noticed a weird smell coming from one of my hives. Turned out to be American foulbrood. Catching it early saved my other hives from infection. So trust your senses and investigate anything that seems off.
Cleaning and Storing Your Equipment
Lastly, cleaning and storing your equipment. I used to be lazy about this, but it really pays off to be thorough. Give your hive tool a good scrape and clean it with rubbing alcohol. Make sure your smoker is completely out before storing it. I almost set my shed on fire once because I didn’t check properly.
For your protective gear, give it a good shake outside and then wash it. Your family will appreciate not smelling eau de smoker every time you walk by.
Store everything in a dedicated beekeeping tote. It keeps things organized and stops you from losing stuff. Nothing worse than realizing you forgot your hive tool when you’re already suited up.
Remember, wrapping up an inspection is all about setting yourself up for success next time. Take your time, be thorough, and your bees will thank you for it.
9. Record Keeping: Documenting Your Findings
Alright, let’s talk record keeping for beekeeping. When I started out, I thought I could keep everything in my head. Big mistake! After mixing up which hive had chalkbrood and harvesting honey too early from a weak colony, I learned my lesson.
Essential Information to Record
So, what’s essential to record? First, always note the date. Sounds obvious, but you’d be surprised how often I used to forget. Then, jot down the colony’s strength. Are they buzzing with activity or looking a bit sluggish?
I always note if I spotted the queen. If she’s playing hide and seek, at least look for eggs or young larvae. Don’t forget to check honey stores and pollen reserves. You don’t want your bees going hungry in winter ’cause you forgot to keep track.
Methods for Keeping Inspection Logs
Now, for methods of keeping logs. I used to scribble on whatever scrap paper I could find. Half the time, I’d lose ’em before getting back to the house. Not exactly a winning strategy.
These days, I swear by my waterproof notebook. It’s survived being dropped in honey, smoker ash, and even took a swim in my uncapping tank once. Some beekeepers use fancy apps, but I’m old school. Plus, I don’t trust myself not to drop my phone into a super full of angry bees.
Whatever method you choose, be consistent. Make a habit of recording right after each inspection. Don’t think you’ll remember everything later. Trust me, you won’t.
Using Records to Track Hive Health Over Time
Using records to track hive health over time? That’s where the magic happens. It’s like watching your kids grow up, but with more stingers. Good records help you spot patterns and potential problems before they become disasters.
I once noticed one of my hives had a slightly lower population count for a few inspections in a row. Turned out they had a failing queen. If I hadn’t been tracking it, I might not have caught it in time to requeen.
Good records also help you decide when to treat for mites, add supers, or start winter prep. It’s like having a crystal ball, but instead of mystical powers, you’ve got good old-fashioned data.
There’s nothing quite like looking back at your records and seeing how far your bees have come. It’s oddly satisfying, like finally getting that stubborn jar open.
So don’t skimp on record keeping, folks. Your future self (and your bees) will thank you.
10. After the Inspection: Next Steps
Alright, let’s talk about what to do after a hive inspection. Back when I started, I thought my job was done once I closed up the hive. Boy, was I wrong!
Planning Follow-Up Actions
First up, planning follow-up actions. After each inspection, I sit down with a cold drink and think about what I saw. One time, I noticed a hive was light on stores. Instead of just worrying, I made a plan to whip up some sugar syrup. It’s all about being proactive.
If you spotted any issues, plan how to address ’em. Maybe you need to order a new queen or add another super. Whatever it is, write it down and set a timeline. Your future self will thank you.
When to Seek Help or Advice
Now, when to seek help or advice. This one’s tricky ’cause us beekeepers can be stubborn. I remember seeing signs of American foulbrood once and thinking I could handle it myself. Big mistake.
My rule of thumb: if you’re unsure, ask for help. There’s no shame in it. Reach out to experienced beekeepers or your local agricultural extension office. They’re usually happy to lend a hand or an ear. And if you’re really stuck, consider hiring a pro for a consultation.
Preparing for Your Next Inspection
Lastly, preparing for your next inspection. This is where a bit of forethought saves you headaches.
Clean and maintain your equipment. I learned this the hard way when my smoker conked out mid-inspection once. Not fun trying to calm agitated bees with just your winning personality!
Review your notes from the last inspection. What issues did you identify? Did you follow through on action items? This’ll help you focus next time.
Keep an eye on the weather forecast. I once planned an inspection on what was supposed to be a beautiful day. Turned out to be a thunderstorm of biblical proportions. Now I always have a backup day.
And don’t forget to stock up on supplies. Nothing worse than realizing you’re out of smoker fuel when you’re already suited up.
Remember, beekeeping is as much about planning as hands-on work. By taking these steps, you’re setting yourself up for success. And that’s what we all want – happy, healthy bees and maybe a little honey on the side.
The Final Buzz
Congratulations, you’ve just completed your crash course in hive inspection 101! Remember, each inspection is a learning experience, an opportunity to deepen your connection with your bees and hone your beekeeping skills.
Don’t worry if you don’t catch everything the first time – or the tenth time, for that matter. Beekeeping is an art as much as a science, and like any art, it takes practice to master. Keep these steps in mind, stay calm, and most importantly, enjoy the fascinating world you’re privileged to peek into.
Before you know it, you’ll be inspecting hives with the confidence of a seasoned pro. Now go forth, intrepid inspector, and may your smoker always stay lit and your veil remain bee-free!

